
Create Webhook
This topic describe the procedure on how you can create and configure the webhook in the Salesforce.
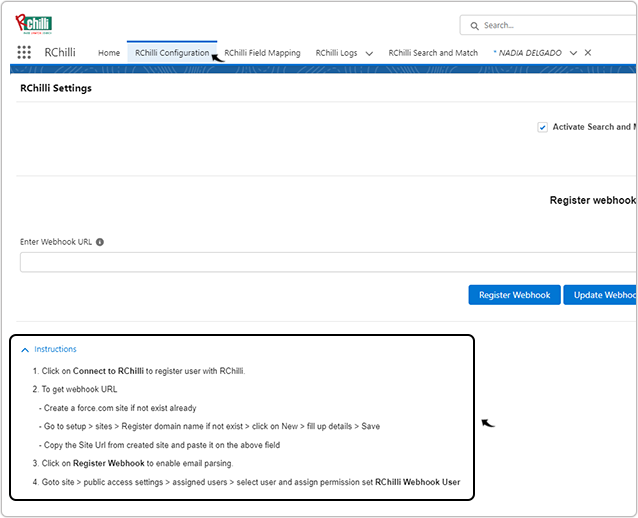
- Go to the RChilli Configuration tab, Enter Webhook URL if you already
have, if not follow the below steps to create the webhook URL.Note: You can follow the steps mention in the Instructions block to create the webhook URL.
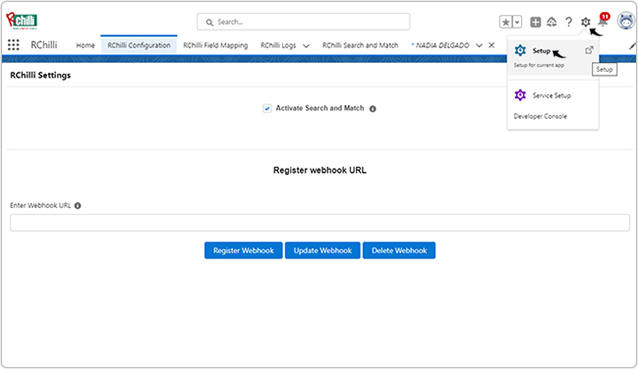
- Click on the Setting icon on the right side of the page and select
Setup from the drop-down options.
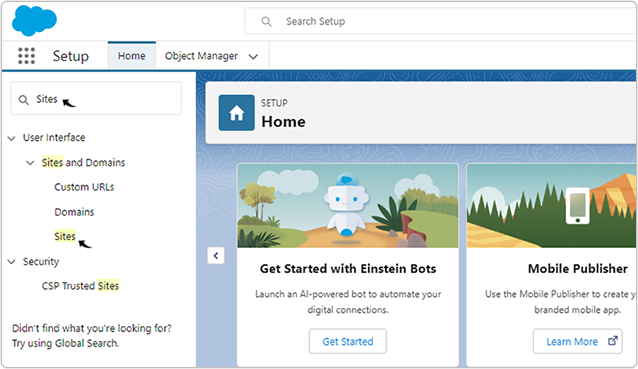
- Search for the Sites and select Sites from the drop-down
options.
- On the Sites page, click New to create a new webhook URL.
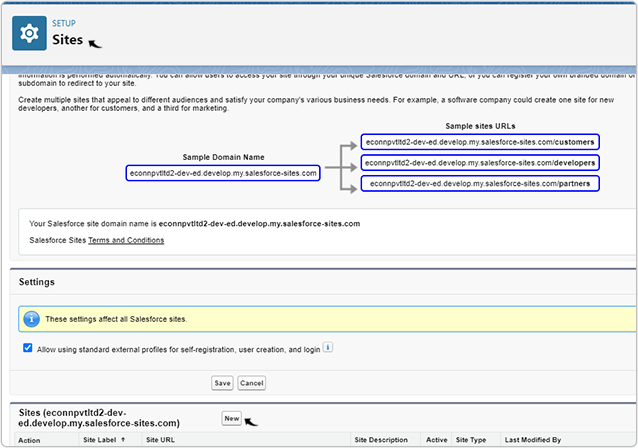
- On the Site Edit page, enter Site Label, select Active
checkbox, and click Search icon and select AnswersHome
for Active Site Home Page.

- Once you filled the details as mentioned above, click Save at the bottom of
the Site Edit page.

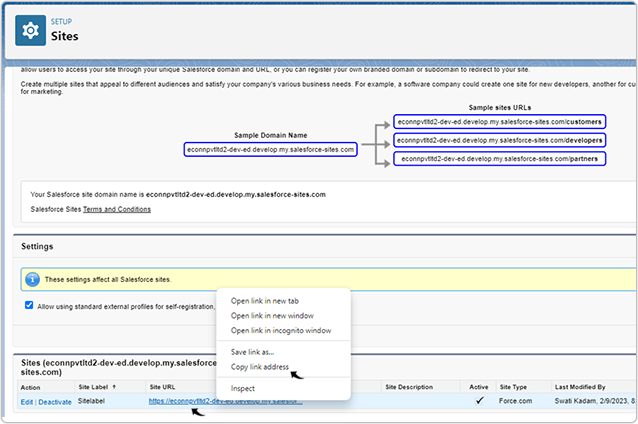
- Go back to the Sites page (step-4 above) to find the webhook URL under the
Site URL column. Right click on the webhook URL (Site URL column) and
select Copy link address to copy the webhook URL.
- Once you copy the webhook URL above, go to the RChilli Configuration tab
again, Enter Webhook URL, and click Register Webhook.Result: Once the webhook register successfully, that means your email is now integrated and you can send email.
- User updated to RChilli version 1.16 or higher must send resumes to sfresume@rchilli.com.
- User with older version of RChilli can continue sending resume to parsing@rchillimail.com.
Note: Before you start sending the resumes for email upload, you must give the permission to the Sitelable profile, see Permissions for Sitelable Profile.