
RScript
With RChilli RScript, a web plugin, reduce parsing integration time from 2 hours to 2 minutes.
Users need an API call to use a resume parser, but this plugin uses Javascript to
integrate and parse resumes. Thus, users do not need to spend hours on API integration.
They can easily parse resumes using Javascript and can see the results in a few seconds.
This feature helps users on following:
- With RChilli RScript, a web parsing plugin can be added quickly.
- Shortlist candidates instantly.
- Saves data entry time post-event.
RScript Configuration
Follow the below procedure to configure the RChilli RScript with your job application
web platform to use the resume parser API.
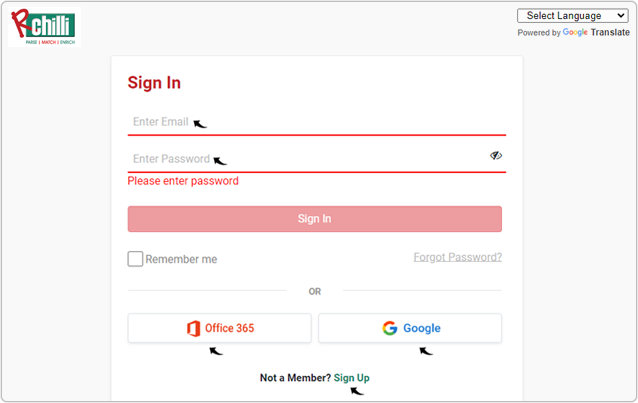
- Enter your Email and Password to log in to your RChilli My
Account client portal or use Office 365 or Google to log in as
necessary. You must sign up if you do not have registered account.Note: Contact support@rchilli.com for My Account portal access, subscription plans, pricing, and for any further support.
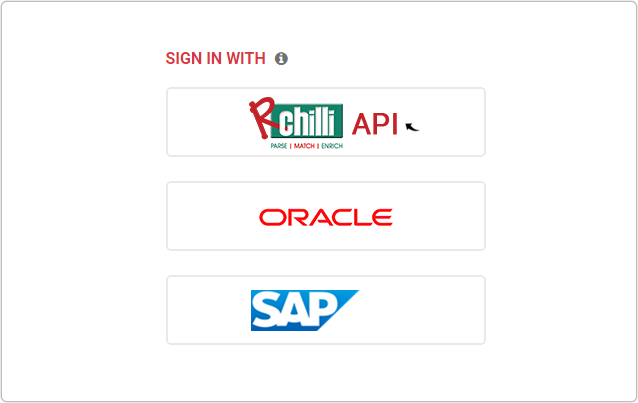
- Click RChilli API to log in into RChilli My Account portal.
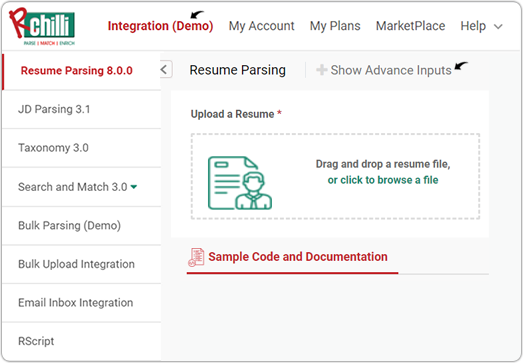
- On the Integration (Demo) tab, click the Show Advance Inputs
tab and expand.
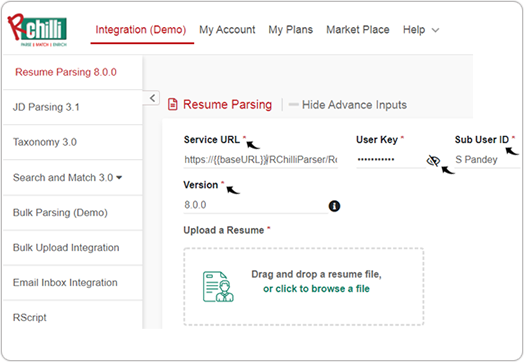
- Do a check and make sure that the Service URL, User Key,
Version, and SubUser ID details are entered and valid. For
more details on API keys, refer How to get user key.
- On the Integration (Demo) tab, click RScript on the left-side
navigation panel. Note: If RScript tab is not available, contact support@rchilli.com to get this enabled from back-end.
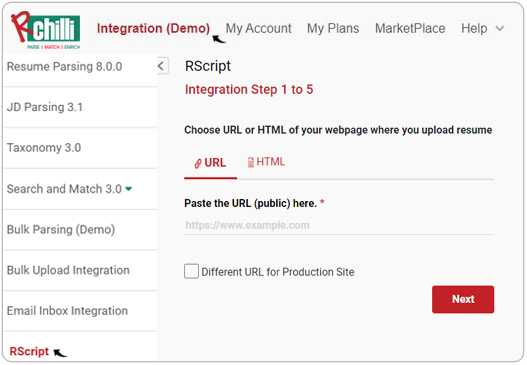
- Follow the below sub-steps and select the URL or HTML of your webpage (ATS portal/Job
portal).
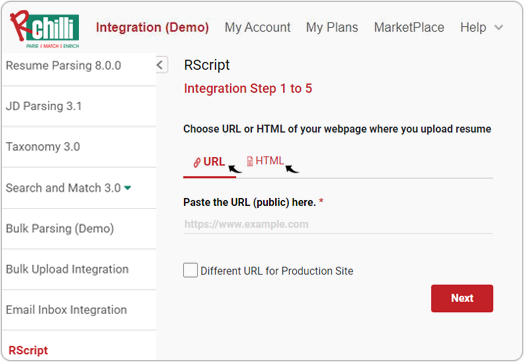
- URL: Choose URL option when your webpage is
not password protected and not required any login/registration.
- Paste your webpage URL in the Paste the URL (public)
here fields and click Next.

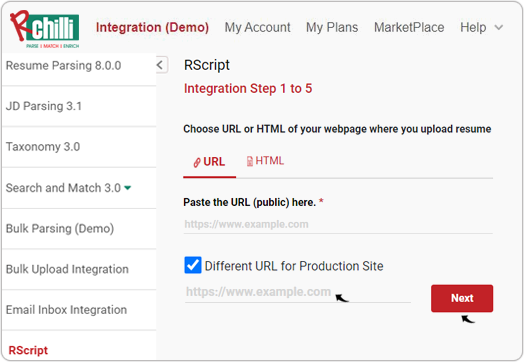
- If you want to use the testing environment's webpage, check
the checkbox for Different URL for Production Site
and fill the URL of your testing webpage and click
Next.
- Paste your webpage URL in the Paste the URL (public)
here fields and click Next.
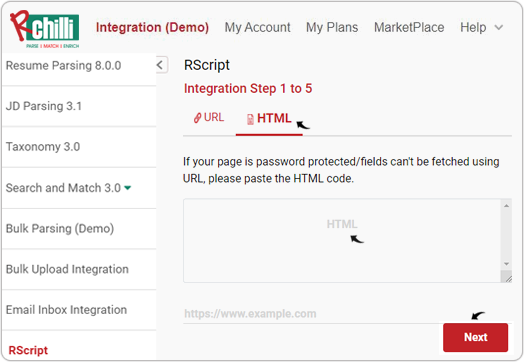
- HTML: Chose an HTML option when your webpage
is password-protected, required user login/registration, or the
fields are not fetched using URL option above.
- Follow the below steps on copying your webpage HTML
code, paste it in the HTML box, and click
Next.
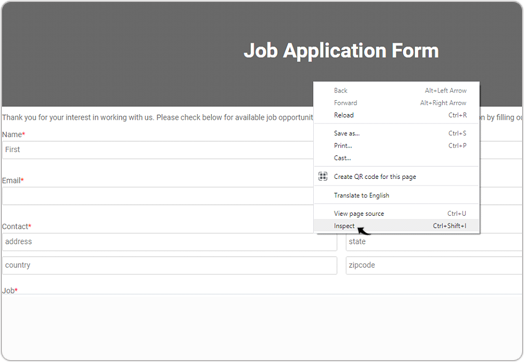
- To get the HTML code of the webpage, right-click and
select Inspect on your webpage.
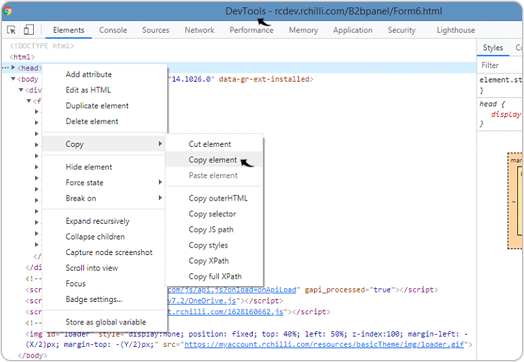
- A DevTools webpage will open the HTML code of
your webpage, select the <head> element,
right-click and select Copy element.
- Paste the copied HTML code in the HTML box on the RScript page as mention in the above step 5 (b).
- To get the HTML code of the webpage, right-click and
select Inspect on your webpage.
- Follow the below steps on copying your webpage HTML
code, paste it in the HTML box, and click
Next.
- URL: Choose URL option when your webpage is
not password protected and not required any login/registration.
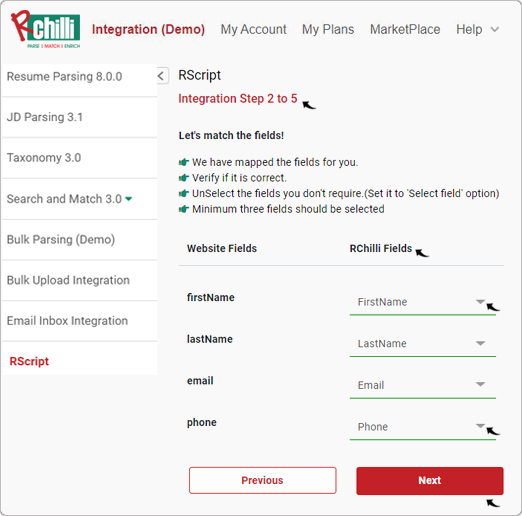
- On the RScript Integration Step 2 to 5 page, the fields
from your webpage are mapped.
- Update the mapped RChilli fields as necessary.
- If any field is not mapped, click Select Field and map a value.
- Once all fields are mapped, click Next.Note: The fields that are not mapped with any value, red lines, as alert, will be displayed.
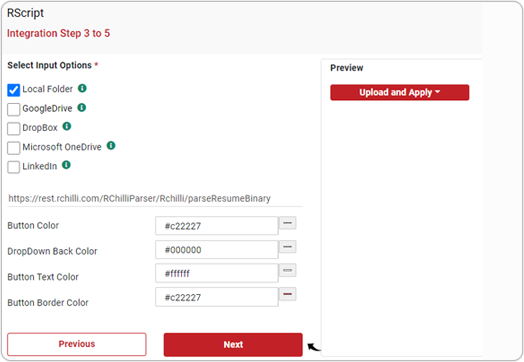
- On the RScript Integration Step 3 to 5 page, do the following:
- Select Input Options from where the resumes will be uploaded by your users.
- If you select input options other than Local Folder, you must
fill in the Application Id and Client Id provided by
the input options. Note: The Link on how you can find the Application Id and Client Id are available on the input options' tool-tip.
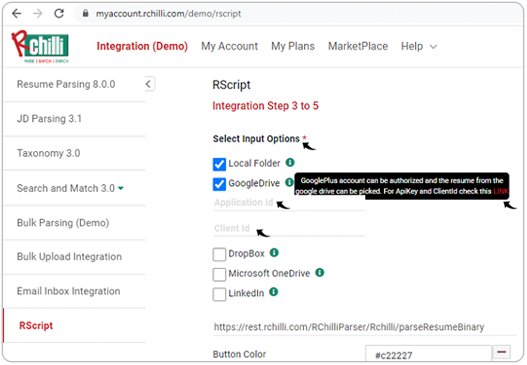
- Once you selected the input options, update the
upload button design of your webpage. For example, you can update
the upload Button Color, Button Text Color, etc., and
see the changes in the Preview box.

- Once the input options are selected, and the upload button design is
set, click Next.
- On the RScript Integration Step 4 to 5 page, the
script tag will display, copy and paste the script tag in your webpage HTML
code (after body tag).Note: If you want to email the script tag to your developer, click the checkbox Email to my web developer.
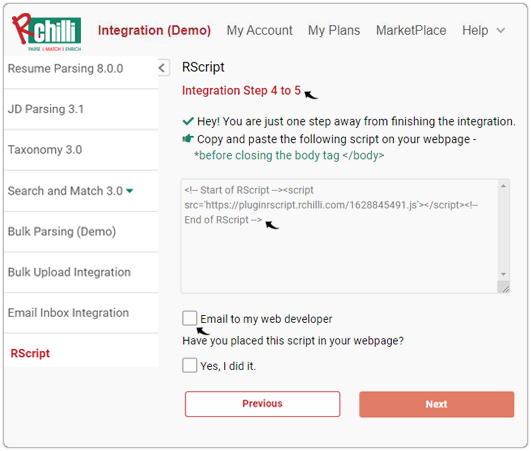
- Once the script tag is added in your webpage HTML code, click the
checkbox Yes I did it and click Next.

- Once the script tag is added in your webpage HTML code, click the
checkbox Yes I did it and click Next.
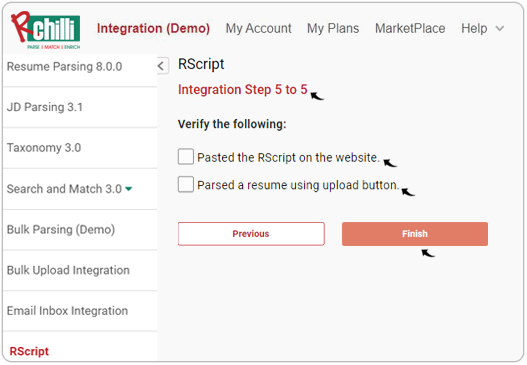
- On the RScript Integration Step 5 to 5 page, check the following checkboxes and click Finish.
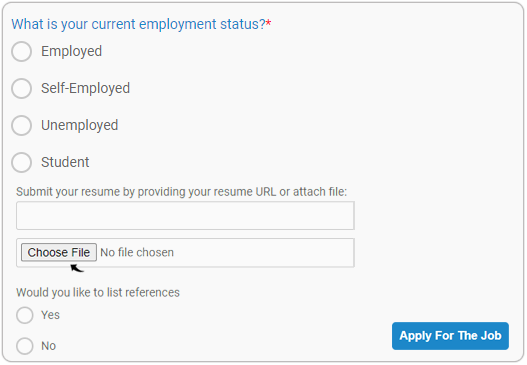
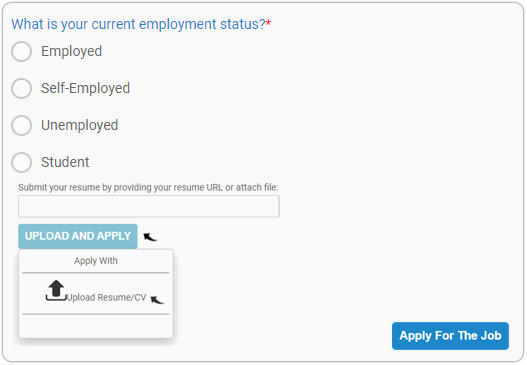
Result
- Once the RChill RScript is added to your webpage (ATS, job portals etc), an upload button will be added to your webpage.
- Once you upload a resume, all the fields mapped in step 6 will be auto-filled in the webpage. For more details, see Auto-fill Data Fields.
| Before RScript | After RScript |
|---|---|
 |
 |