Create Flow
Once the job description field mapping is configured successfully, you must create the flow as mentioned in this topic so that you can add JD's in Salesforce. Follow the below steps to create a flow.
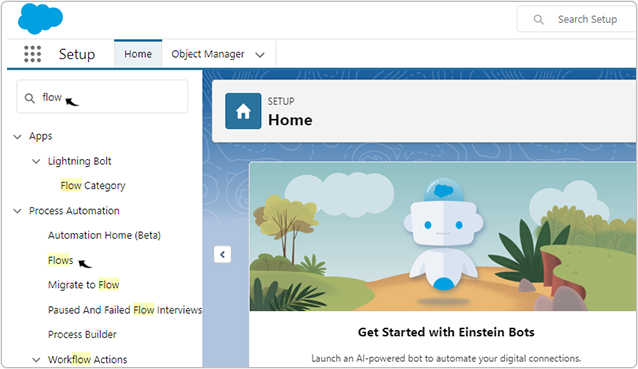
- On the Salesforce home page, search for Flow in the search bar and click
Flows in the drop-down.
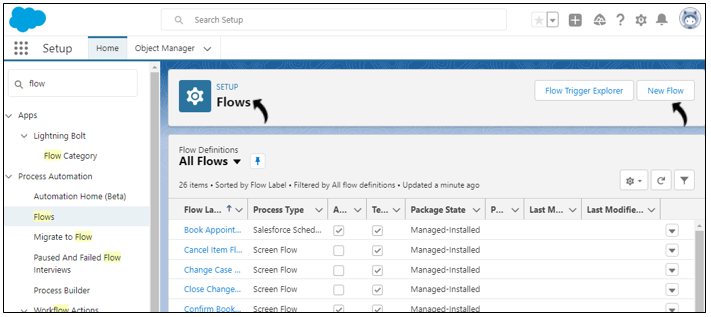
- On the Flows page, click New Flow.
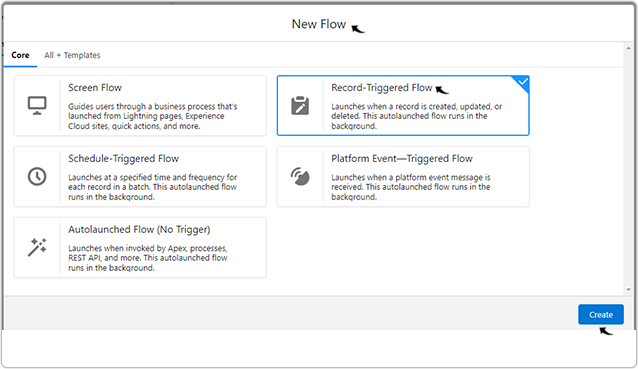
- On the New Flow pop-up, select Record-Triggered Flow and click
Create.
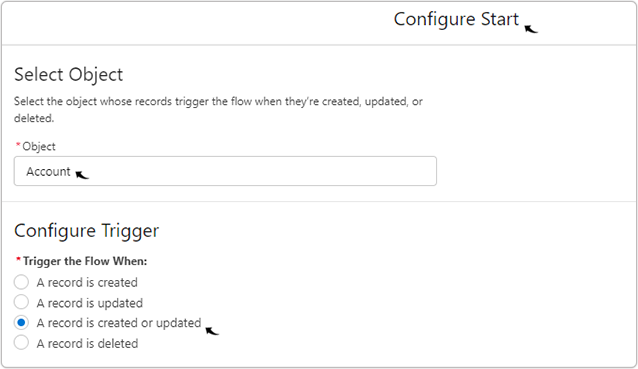
- On the Configuration Start pop-up:
- Select Object: Select the Object related to the Job Records.
- Configure Trigger: Select a trigger criteria for flow i.e., A
record is created or updated.
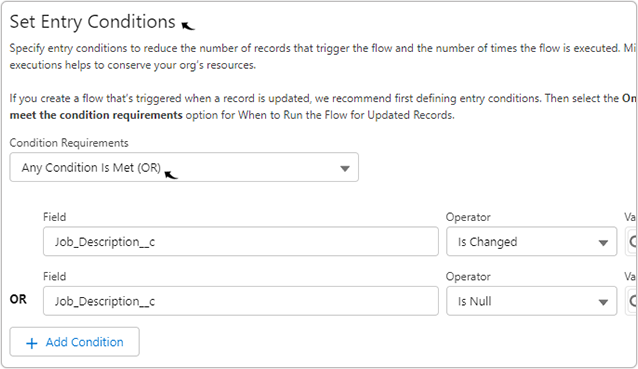
- Set Entry Conditions: Add two condition as mention below:
- Field: Job_Description_c Operator: Is Changed Value: True
- Field: Job_Description_c Operator: Is Null Value:
False
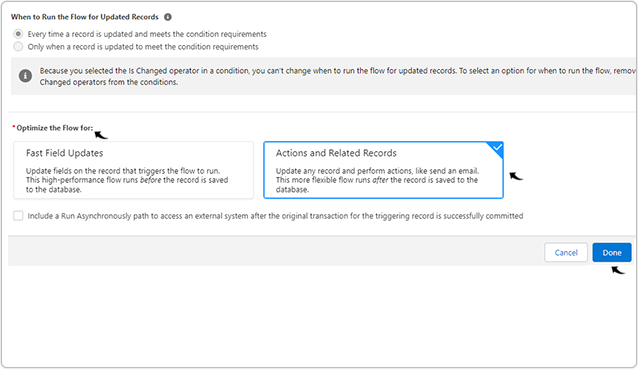
- For the Optimize the Flow for section, make sure you selected
Actions and Related Records and click Done.
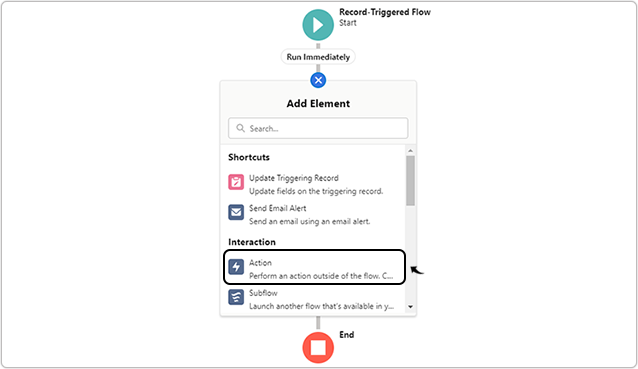
- Click Plus
 symbol to add element for the
flow.
symbol to add element for the
flow.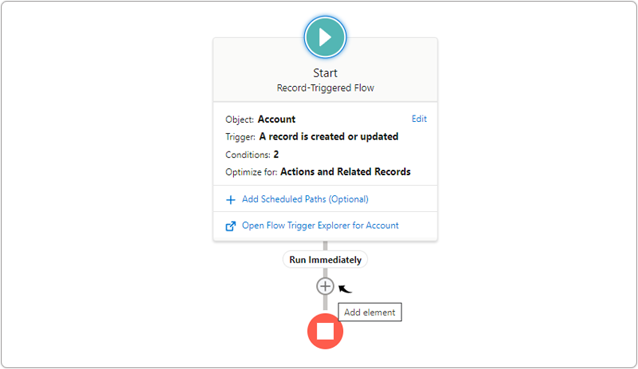
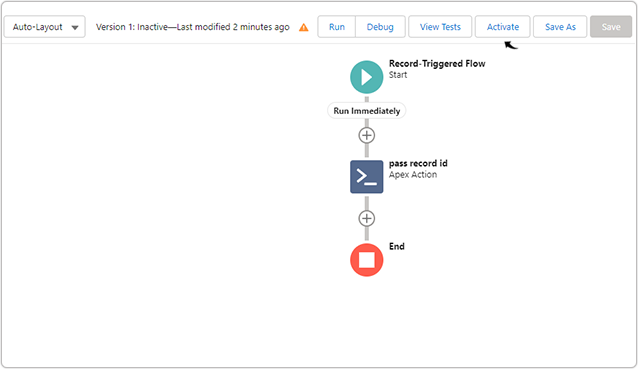
- Click Action to add a New Action for the flow.
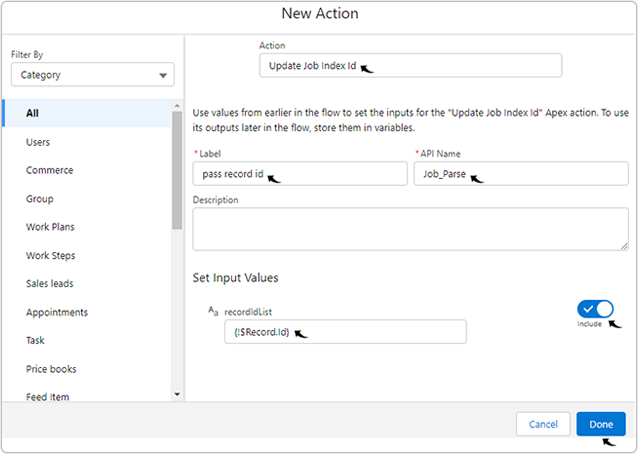
- On the New Action pop-up, do the following:
- Action: Select Update Job Index Id from the Action drop-down.
- Label: Enter pass record id in the Label field.
- API Name: Enter Job_Parse in the API Name field.
- recordIdList: Enter {!$Record.Id} in the recordIdList
field.Note: Turn the toggle to Include to enter a recordIdList.
- Click Done to completes the new action.
- On the Save the flow pop-up, enter Flow Label, Flow API Name,
and click Save.
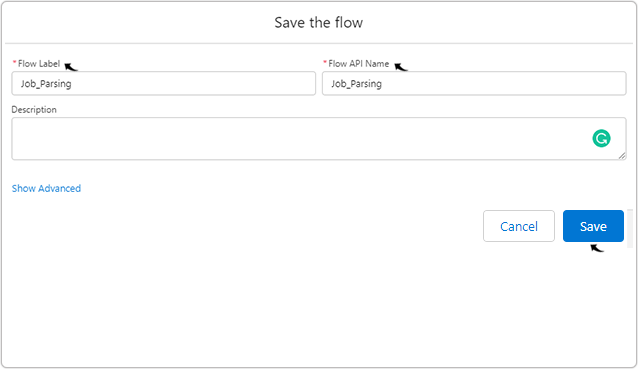
- Once the flow is saved, click Activate to activate the flow.