
Prerequisite for RChilli SAP Browser Assistant
Before you can use the RChilli SAP browser assistant you must do the SAP browser assistant configuration in the RChilli My Account client portal for SAP as described in this topic.
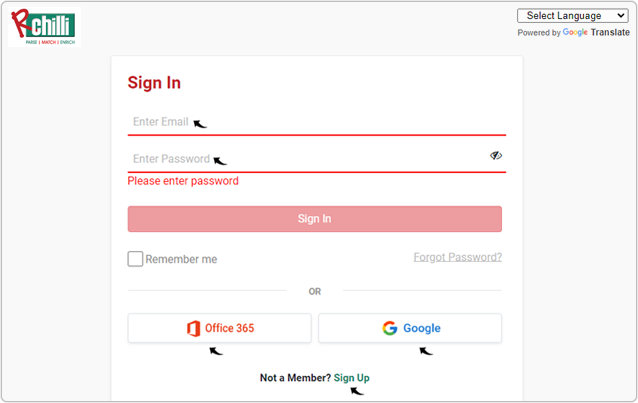
- Enter your Email and Password to log in to your RChilli My Account
client portal or use Office 365 or Google to log in as necessary. You
must sign up if you do not have registered account.Note: Contact support@rchilli.com for My Account portal access, subscription plans, pricing, and for any further support.
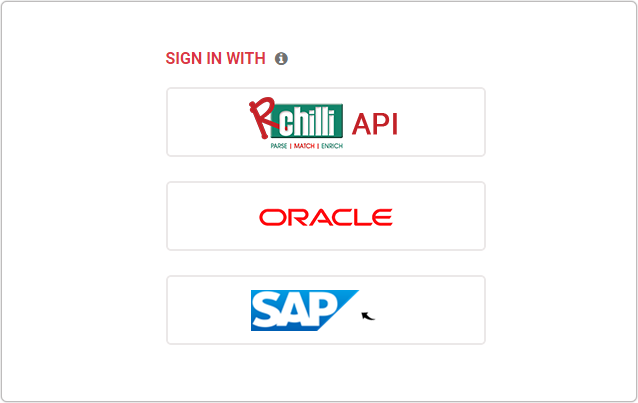
- Click SAP to log in into RChilli My Account client portal for SAP.
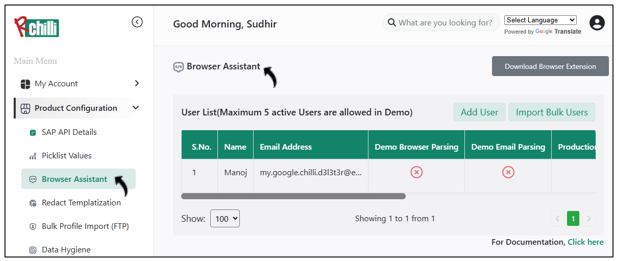
- Navigate to . Note:
- On the Browser Assistant page, you can add, update or delete a SAP user, see below sections for more details.
- Make sure you already configure the SAP API details. Refer SAP API Details for more details.
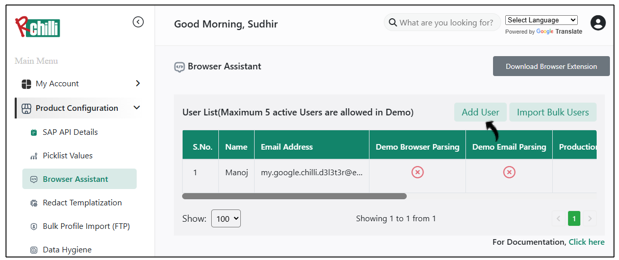
Add User
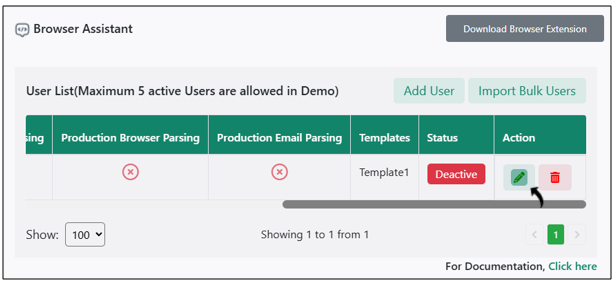
This section describe the procedure on how you can add user (team member) to use SAP browser assistant.- On the Browser Assistant page, click Add User or Import Bulk
Users to give access to user for the SAP browser assistant.
- The Add User button is enabled only when you have filled the SAP API details. Refer SAP API Details for more details. The Import Bulk Users button is used to add users in bulk.
- Demo user can be added as per the maximum limit allowed. For
Production, you can add unlimited users.Note: Contact support@rchilli.com if you want to update the allowed limit for the Demo users.
- You can delete the user as necessary.Note: User cannot be deleted if user already used SAP browser assistant, parsed and added a resume.
- You can edit the user details. See Update User for more details.
- You can activate or deactivate the listed users as necessary, see below
Update User section.
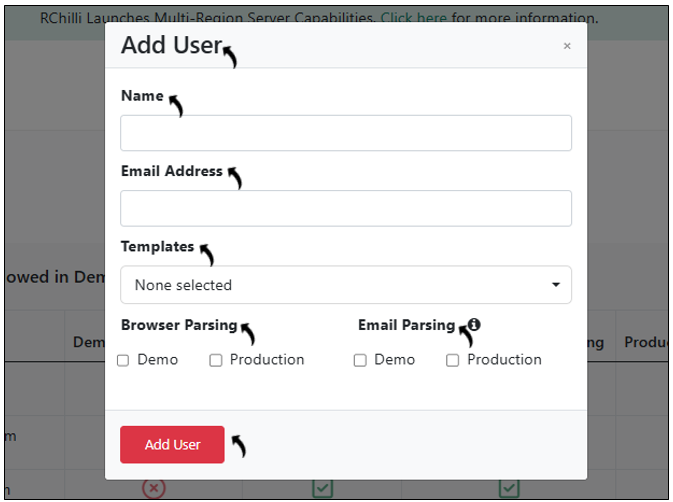
- On the Add User pop-up, enter User Name, User Email, select
options for Browser Parsing and Email Parsing as necessary, and
click Add User.Note:
- Select the redaction templates from the drop-down. These selected templates will be available to the user for configuring redaction settings. To know more details on redaction, refer Redact Template Settings.
- Demo button for Browser Parsing is disabled if you have exceeded the maximum allowed limit.
- For Email Parsing, you can either select Demo or Production.
Update User
This section describe the procedure on how you can update user (team member) details.- Click on the Edit icon to edit the user details.
- On the Update User pop-up, update User Name, User Email,
options for Browser Parsing and Email Parsing as necessary and
click Update User.Note:
- You can updates the Templates for the redaction as necessary for the user.
- Click Deactivate check-box to deactivate the user.
