Creating Custom Role
Create a custom role, assign required privileges (role), assign the role to a user, and synchronize roles in Oracle HCM.
Why use a Custom Role
You can assign required privileges in one of the following ways:
- Assign privileges (role) directly to each user, or
- Create a custom role, add the required privileges, and assign the custom role to users (recommended).
Using a custom role is recommended because:
- You can manage privileges in one place.
- You do not need to update each user individually.
- Any changes to the role are automatically applied to all users assigned to it.
Create Custom Role
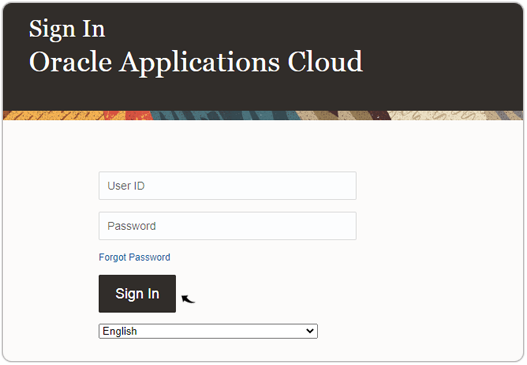
- Visit and sign in to your Oracle Cloud HCM Application.Note: You must have the Application Implementation Consultant Role to configure the RChilli integration. Contact Oracle admin for more details.
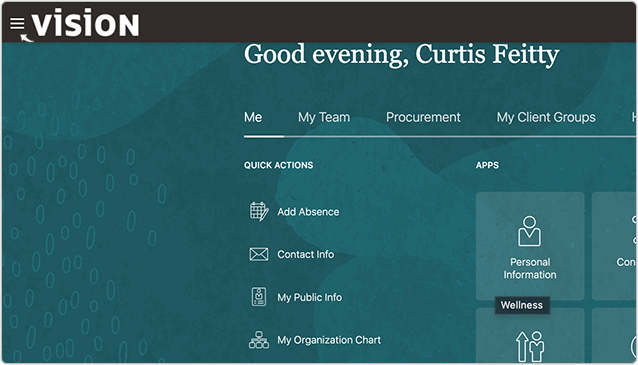
- Click on the three lines on the left-hand side top corner.
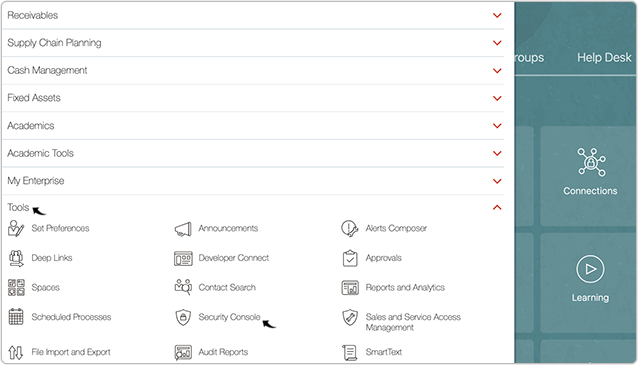
- Navigate to Tools > Security Console.
- On the Roles page, click Create Role.
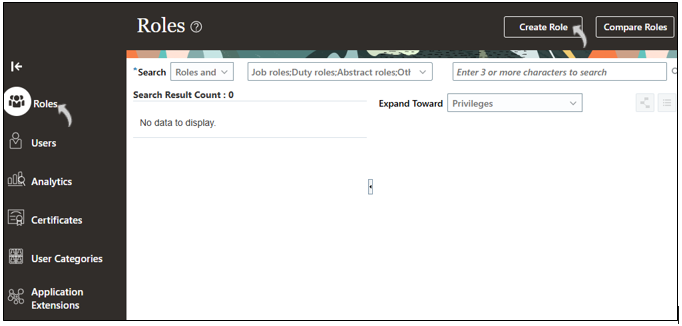
-
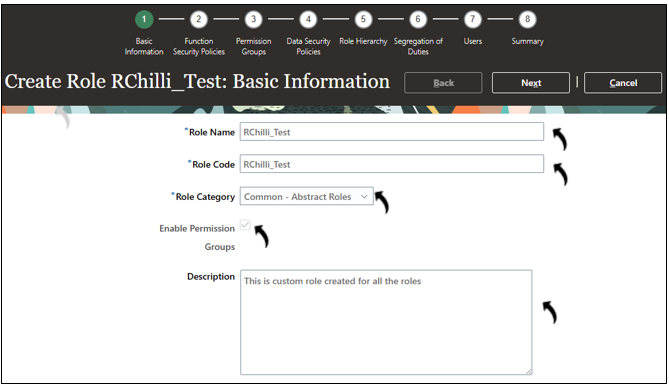
In the Basic Information section, enter the following details and click Next.
- Role Name
- Role Code
- Role Category
- Select Enable Permission Groups and make sure the checkbox is selected.
- Description
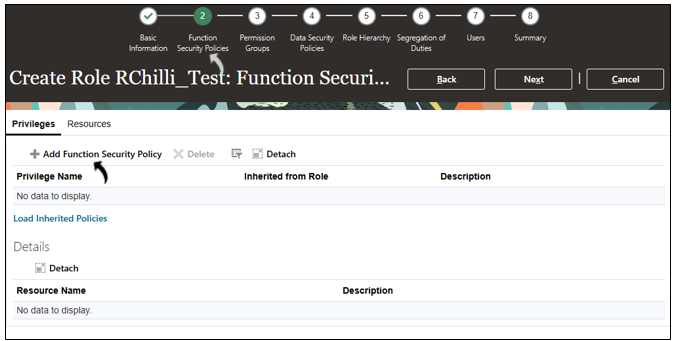
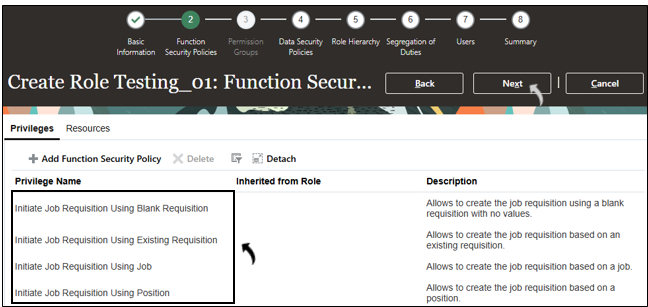
- On the Function Security Policies page, click Add Function Security
Policy.
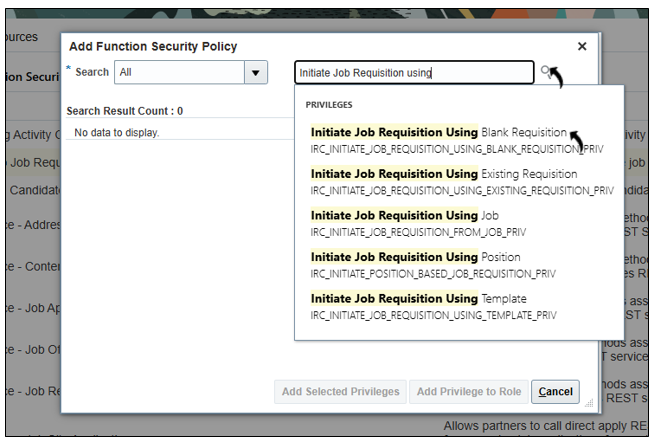
- In the Add Function Security Policies dialog box, search for and add the
required privileges based on the RChilli solution being implemented, as shown in
the following table.Note: Add only the privileges marked with X for the applicable RChilli solution. A blank cell indicates that the privilege is not required for that solution.
Required Privilege RChilli Solutions Employee Profile Update Full Database Resume Reprocessing Unbiased Hiring Smart Apply Recruiter Hub Description Initiate Job Requisition Using Blank Requisition
X Allows to create the job requisition using a blank requisition with no values Initiate Job Requisition Using Existing Requisition
X Allows to create the job requisition based on an existing requisition Initiate Job Requisition Using Job
X Allows to create the job requisition based on a job Initiate Job Requisition Using Position
X Allows to create the job requisition based on a position Initiate Job Requisition Using Template
X Allows to create the job requisition based on a requisition template Initiate Pipeline Job Requisition X Allows to create pipeline job requisitions Manage Job Requisition Interview Schedule X Allows to create or update interview schedules for job requisition Manage Job Requisition Questionnaire Request X Allows to manage the list of questionnaires associated with a job requisition Manage Job Requisition Screening X Allows to manage the list of questionnaires associated with a job requisition Post Job Requisition to Company Career Site X Allows to post the job requisition to career sites. Post Job Requisition to Job Distributor's Portal X Allows access to partner portal for job posting and job posting removal Update Job Requisition After Draft Phase X Allows to update some job requisition fields when a requisition is not in draft phase Update Job Requisition Posting Locations X Allows to update a job requisition's primary location and other locations when a requisition can't be redrafted. Use REST Service - Job Requisitions X Allows the user to call all methods associated with the Recruiting job requisitions REST service Use REST Service - Questionnaire Lists of Values X Allows the user to call the GET method associated with the questionnaire lists of values REST services - Once the necessary privileges (roles) are added, click Next.
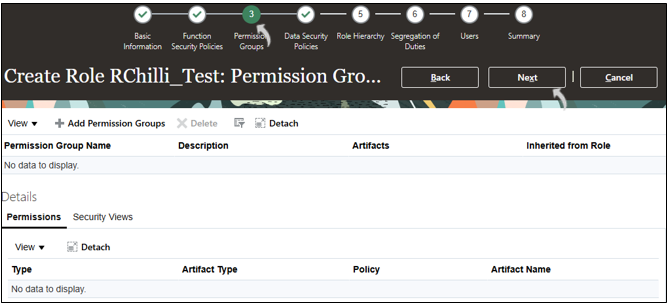
- For the Permission group, click Next to continue (no action
required).
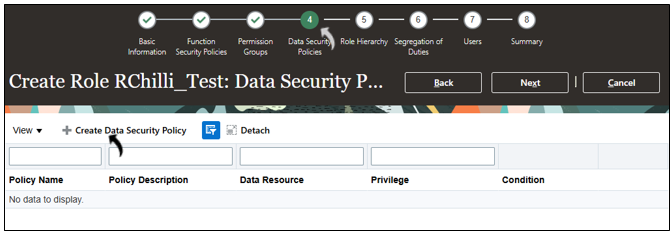
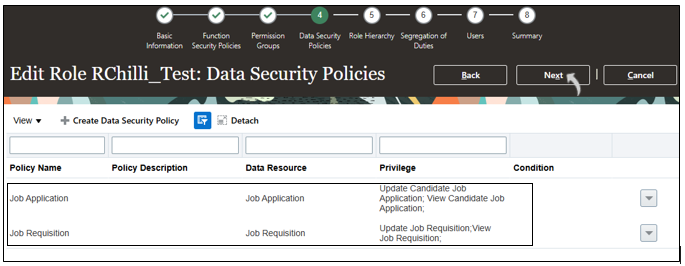
- On the Data Security Policies page, click Create Data Security
Policy.
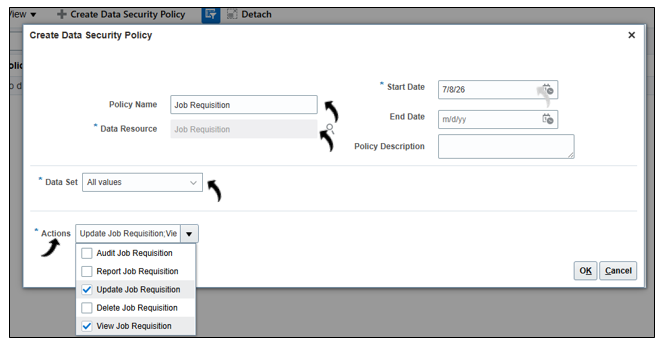
- In the pop-up window, do the following and click OK.
- Policy Name: Enter Job Requisition
- Data Resource: Search and add Job Requisition
- Actions: Select View and Update Job Requisition options
 Note:
Note:- The Job Requisition data security policy shown above is provided as an example and corresponds to the first entry in the following table. Continue creating the remaining applicable data security policies listed in the table based on the RChilli solution being implemented.
- For each data security policy, select all actions listed for the corresponding Policy Name/Data Resource in the following table. For example, the Job Requisition data security policy requires selecting both Update Job Requisition and View Job Requisition actions.
- For all data security policies, set Data Set to All values. Set the Start Date to the current date. The End Date and Policy Description fields can be left blank
Policy Name and Data Resourse Actions RChilli Solutions Description Employee Profile Update Full Database Resume Reprocessing Unbiased Hiring Smart Apply Recruiter Hub Job Requisition Update Job Requisition X Grants users the ability to edit and modify existing job requisitions in Oracle HCM Cloud Recruiting, View Job Requisition X Grants read-only access to view job requisition details in Oracle HCM Cloud Recruiting Candidates Manage Candidate X X X X X Grants the ability to create, view, update, and manage candidate profiles and records within Oracle HCM Cloud Recruiting View Candidate X X X X X Grants read-only access to candidate profiles and records in Oracle HCM Cloud Recruiting, allowing users to view but not modify candidate information Human Resources Address View Person Address X X X X X Grants read-only access to a person's address details (such as street, city, postal code, and country) within Oracle HCM Cloud View Person Address for Recruiting X X X X X Grants recruiting users (recruiters, hiring managers) read-only access to a candidate's address details within Oracle Recruiting Cloud Change Person Address X X X X X Grants users the ability to create, update, and modify a person's address records within Oracle HCM Cloud. View Talent Profile Experience and Qualifications X X X X X Grants read-only access to a person's talent profile including work experience, education, qualifications, skills, and certifications within Oracle HCM Cloud Talent Management Job Application Update Candidate Job Application X Grants users the ability to edit and progress candidate job applications through the selection process in Oracle HCM Cloud Recruiting, including updating application details, moving candidates between stages, and taking actions on applications View Candidate Job Application X Grants read-only access to view candidate job application details and status within Oracle HCM Cloud Recruiting Person Address for Table PER_ADDRESSES View Person Address for Recruiting X X X X X Grants recruiting users (recruiters, hiring managers) read-only access to a candidate's address details within Oracle Recruiting Cloud Change Person Address X X X X X Grants users the ability to create, update, and modify a person's address records within Oracle HCM Cloud. View Person Address X X X X X Grants read-only access to a person's address details (such as street, city, postal code, and country) within Oracle HCM Cloud Person Address for Table PER_PERSON_ADDR_USAGES_F View Person Address for Recruiting X X X X X Grants recruiting users (recruiters, hiring managers) read-only access to a candidate's address details within Oracle Recruiting Cloud Change Person Address X X X X X Grants users the ability to create, update, and modify a person's address records within Oracle HCM Cloud. Manage Person Private Address Details X X X X X Grants users the ability to create, view, update, and delete a person's private/sensitive address information in Oracle HCM Cloud View Person Address X X X X X Grants read-only access to a person's address details (such as street, city, postal code, and country) within Oracle HCM Cloud Person Detail View Person Address X X X X X Grants read-only access to a person's address details (such as street, city, postal code, and country) within Oracle HCM Cloud View Person Extra Information X X X X X Grants read-only access to a person's extra information (PEI) segments — additional configurable person-level data fields — within Oracle HCM Cloud Manage License and Certifications Content Type X X X X X Grants the ability to create, update, and manage license and certification content types in the talent profile library View Person Number X X X X X Grants read-only access to a person's unique identifying number within Oracle HCM Cloud Manage Person Email X X X X X Grants the ability to create, update, and delete a person's email address records in Oracle HCM Cloud View Person Contact X X X X X Grants read-only access to a person's contact information within Oracle HCM Cloud View Person Email X X X X X Grants read-only access to a person's email address records in Oracle HCM Cloud Manage Person Contact Details X X X X X Grants the ability to create, update, and delete a person's contact details including phones, emails, and addresses in Oracle HCM Cloud Manage Languages Content Type X X X X X Grants the ability to create, update, and manage language proficiency content types in the talent profile library View Previous Employment Content Type X X X X X Grants read-only access to a person's previous employment history content type within the Oracle HCM Cloud talent profile Edit Person Skills and Qualifications X X X X X Grants the ability to update a person's skills, qualifications, and talent profile attributes in Oracle HCM Cloud View Person Contact Details X X X X X Grants read-only access to a person's contact details including phones, emails, and addresses in Oracle HCM Cloud Manage Person Phone X X X X X Grants the ability to create, update, and delete a person's phone number records in Oracle HCM Cloud. View Person Skill Evidence X X X X X Grants read-only access to evidence and endorsements supporting a person's skills within the Oracle HCM Cloud talent profile Manage Degrees Content Type X X X X X Grants the ability to create, update, and manage degree content types in the Oracle HCM Cloud talent profile library Manage Education Levels Content Type X X X X X Grants the ability to create, update, and manage education level content types in the Oracle HCM Cloud talent profile library View Degrees Content Type X X X X X Grants read-only access to degree content types within the Oracle HCM Cloud talent profile library View Education Levels Content Type X X X X X Grants read-only access to education level content types within the Oracle HCM Cloud talent profile library Access Person Contact Information X X X X X Grants the ability to access and retrieve a person's contact information including phone, email, and address within Oracle HCM Cloud View Person Phone X X X X X Grants read-only access to a person's phone number records in Oracle HCM Cloud Manage Previous Employment Content Type X X X X X Grants the ability to create, update, and manage previous employment history content types in the Oracle HCM Cloud talent profile library View Highest Education Level Content Type X X X X X Grants read-only access to a person's highest education level content type within the Oracle HCM Cloud talent profile. View Honors and Awards Content Type X X X X X Grants read-only access to a person's honors and awards content type within the Oracle HCM Cloud talent profile View Languages Content Type X X X X X Grants read-only access to language proficiency content types within the Oracle HCM Cloud talent profile library View Person Name X X X X X Grants read-only access to a person's name details including first, last, and preferred name in Oracle HCM Cloud View License and Certifications Content Type X X X X X Grants read-only access to license and certification content types within the Oracle HCM Cloud talent profile library Manage Highest Education Level Content Type X X X X X Grants the ability to create, update, and manage highest education level content types in the Oracle HCM Cloud talent profile library - Once Data Security Policies completed, click Next.
- On the Role Hierarchy page, click Add Role.
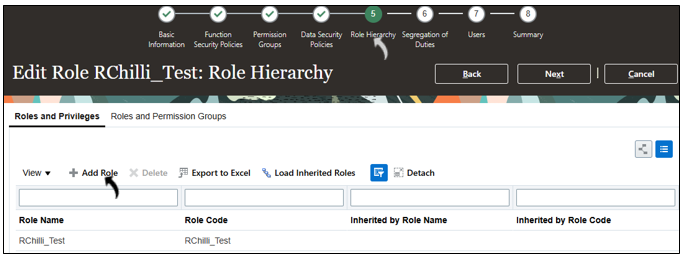
- In the Add Role Membership dialog box, search for and add the required
privileges based on the RChilli solution being implemented, as shown in the
following table.Note: Add only the privileges marked with X for the applicable RChilli solution. A blank cell indicates that the privilege is not required for that solution.
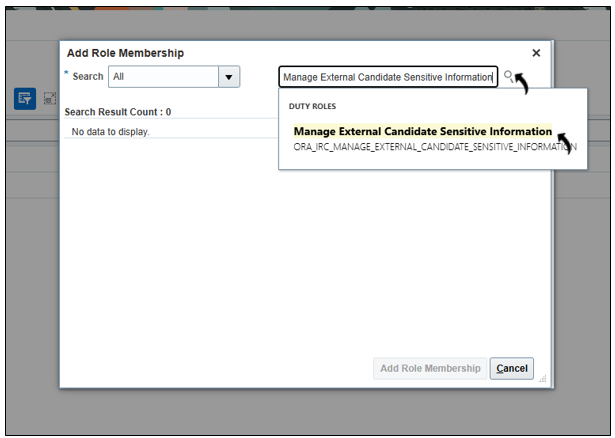
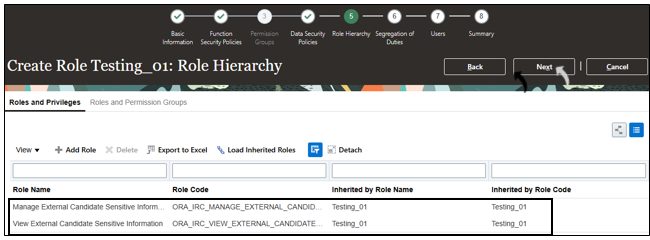
Required Privilege RChilli Solutions Description Employee Profile Update Full Database Resume Reprocessing Unbiased Hiring Smart Apply Recruiter Hub Manage External Candidate Sensitive Information X X X X X Grants authorized recruiting users the ability to view and manage sensitive personally identifiable information (PII) belonging to external candidates in Oracle Recruiting Cloud View External Candidate Sensitive Information X X X X X Grants read-only access to sensitive personally identifiable information (PII) belonging to external candidates in Oracle Recruiting Cloud Use REST Service – Candidates X X X X X Grants full read and write access to the Candidates REST API in Oracle HCM Cloud Recruiting, enabling integrations to create, update, and manage candidate records programmatically Use REST Service - Candidates Read Only X X X X X Grants read-only access to the Candidates REST API in Oracle HCM Cloud Recruiting, enabling integrations to retrieve and query candidate records without making any modifications Use REST Service - Job Applications X Grants full read and write access to the Job Applications REST API in Oracle HCM Cloud Recruiting, enabling integrations to create, update, retrieve, and manage candidate job application records programmatically Use REST Service - Job Requisitions X Grants full read and write access to the Job Requisitions REST API in Oracle HCM Cloud Recruiting, enabling integrations to create, update, retrieve, and manage job requisition records programmatically Use REST Service - Recruiting Lists of Values X X X X X Grants access to the Recruiting Lists of Values REST API, enabling integrations to retrieve valid recruiting reference data such as job families, locations, and requisition statuses Use REST Service - Workers List of Values X X X X X Grants access to the Workers List of Values REST API, enabling integrations to retrieve worker reference data for use in lookups and dropdowns across Oracle HCM Cloud - Once Role Hierarchy completed, click Next to proceed through the
remaining steps and go to the last step Summary (see next step).
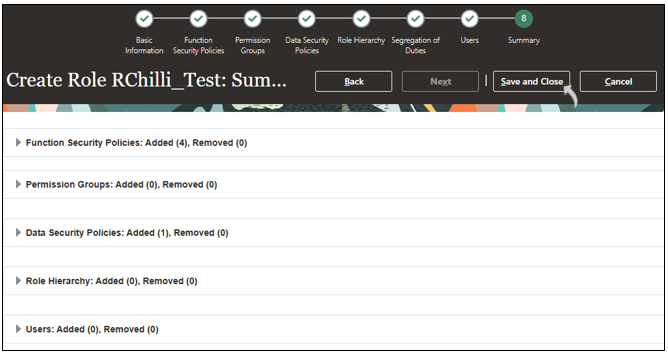
- Review the details on the Summary page and click Save and
Close.
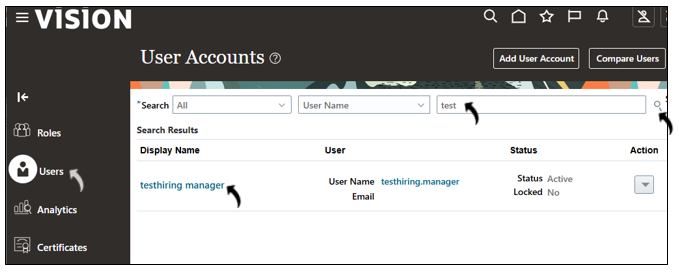
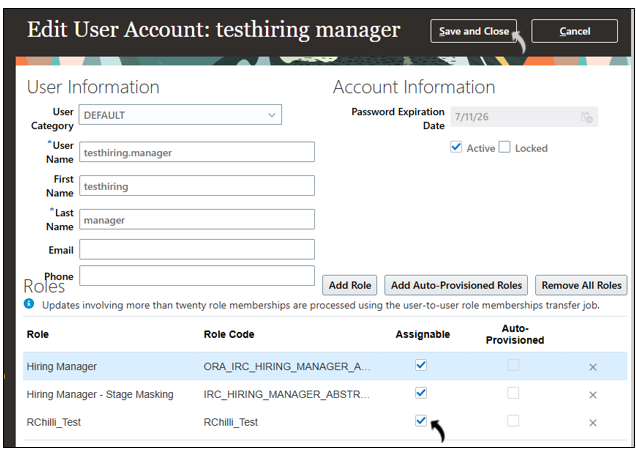
Add the Custom Role to a User
- Go to Users menu, search for the required user and click the user name to
open the profile.
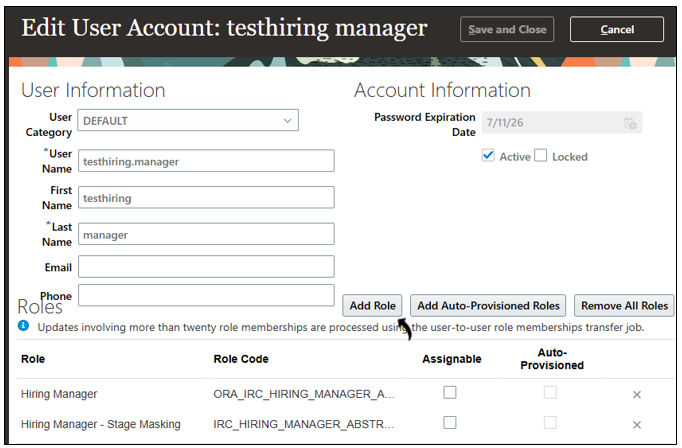
- Click Add Role.
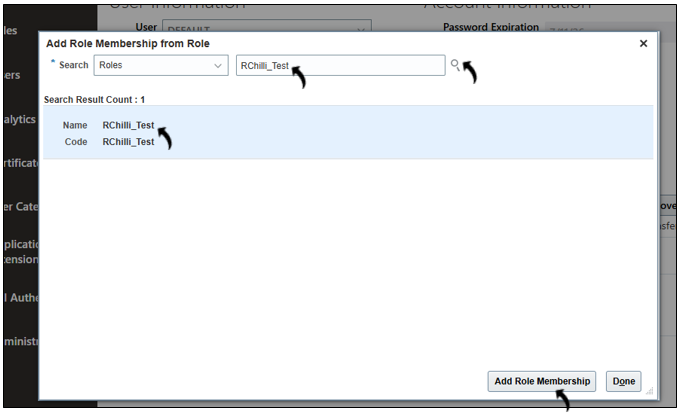
- In the pop-up window, search for the custom role you created earlier, select the
role, and click Add Role Membership.
- Select the Assignable check-box for the role and click Save and
Close.
Synchronize roles and users
After assigning the role, you must synchronize it before it becomes active.
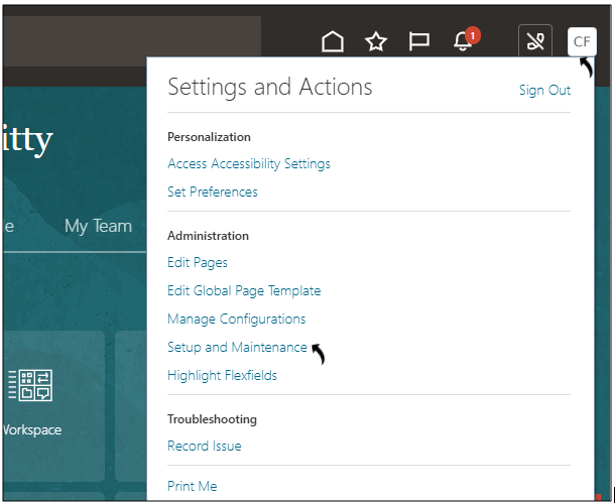
- Navigate to: Profile → Setup and Maintenance.
- Click on the Run User and Roles Synchronization Process.
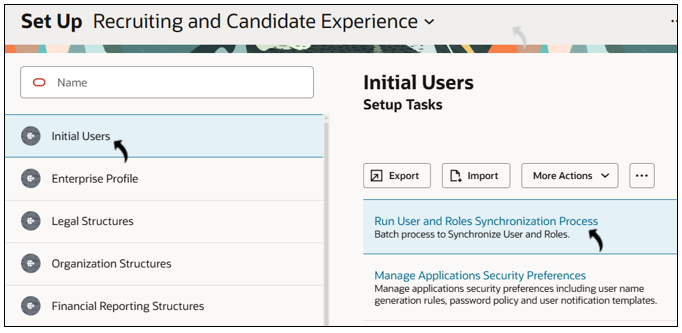
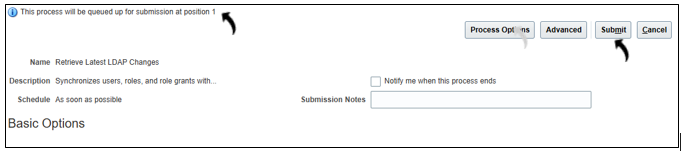
- Click Submit. The process is added to the synchronization queue,
and your request position is displayed.