Client Management
This section describes how the partner can manage the client details.
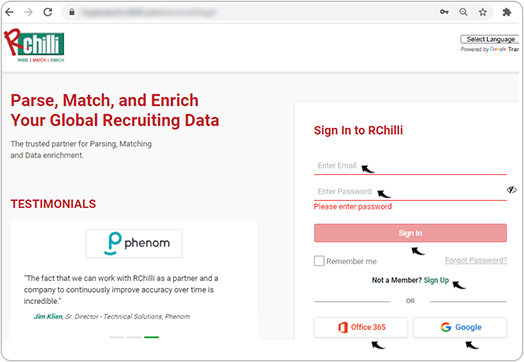
- Enter your Email and Password to log in to your RChilli My Account
partner portal. You can also Sign Up to register a new account or log in
using Office 365 or Google accounts as necessary.Note: Contact support@rchilli.com for My Account portal access, subscription plans, pricing, and for any further support.
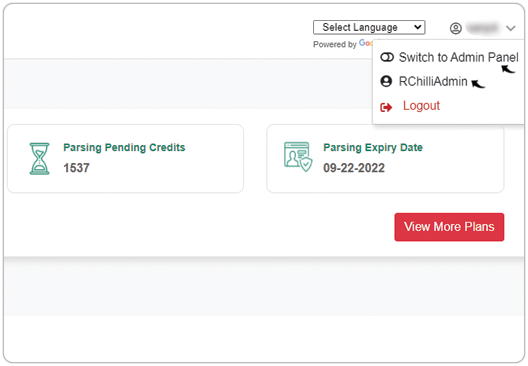
- Once you log in, click your name on the right-hand side top corner and click
Switch to Admin Panel. Note: If you have access to RChilli as admin, you can also switch to RChilli Admin by clicking on RChilliAdmin.
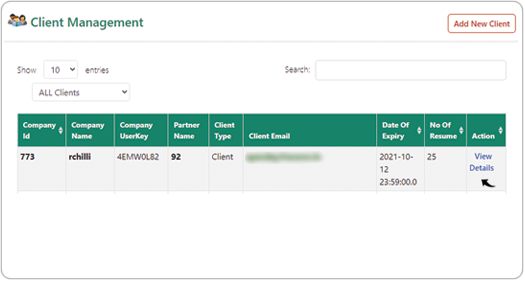
- On the Admin Panel, click Client Management.

- On the Client Management page, you can do the following:
- Add New Client
- Update Company Info
- Email Setup
- Generate Invoice
- Login History
- Manage Users
- Impersonate
Add New Client
Follow the below steps to add a new client on the client management page.
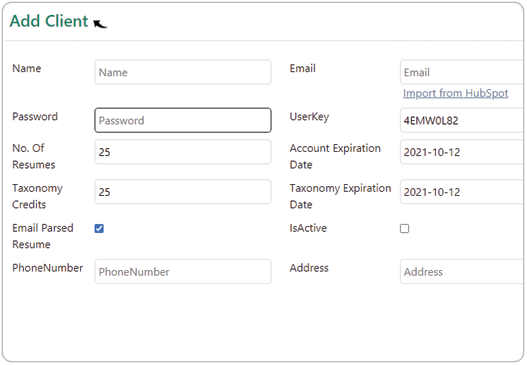
- On the Client Management page, click Add New Client.

- On the Add Client page, fill all the fields as necessary and click
Add Client on the bottom of the page.Note: A success message will be displayed once the client is added successfully.
- Click View Details for the client you added.
- Click Send Verification Link to complete the verification of your new
client/user. Your user will get an email to verify the account.

- Click Edit to edit the profile of your new client/user. A pop-up will
be displayed to edit the user profile, see below step.
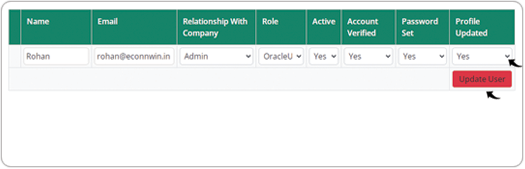
- Edit the profile of your new client/user, such as Email,
Relationship With Company, Role, etc, and click Update
User.

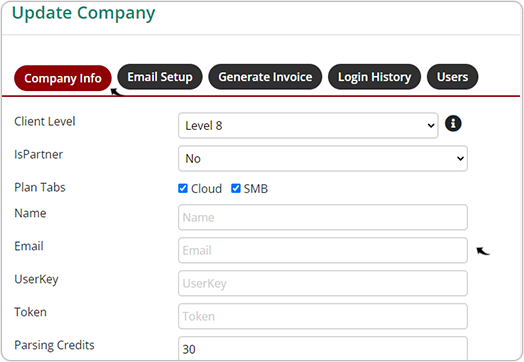
Update Company Info
Follow the below steps to update the company info of your users.
- On the Client Management page, click View Details for the
client you want to update the company information.
- Click Company Info to update the company information of your
user/client such as Name, Email, Client Level etc.
Email Setup
Follow the below steps to setup an email that will be automatically sent once the set
criteria are fulfilled.
- On the Client Management page, click View Details for the
client you want to setup the email.
- Click Email Setup to complete the setup for the automatic forwarding
of the emails. Fill the fields as necessary and check the check-boxes for
all the fields filled.Note: The users will get an automatic email when the set criteria are fulfilled.

Generate Invoice
Follow the below steps to generate an invoice for your client/user.
- On the Client Management page, click View Details for the
client you want to generate the invoice.
- Click Generate Invoice to generate the invoice. On the Generate
Invoice tab, enter Amount in the dollar, specify the
Description, and click Generate.Note: A success message will be displayed once the invoice is generated successfully.

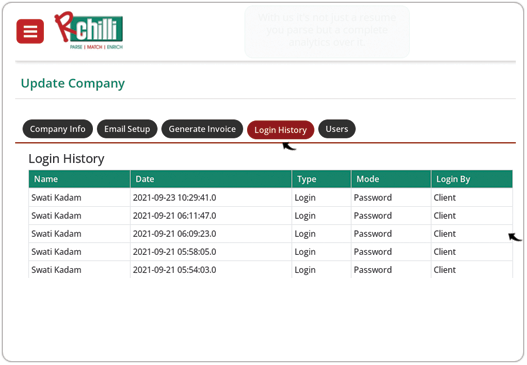
Login History
Follow the below steps to view your client/user login history.
- On the Client Management page, click View Details for the
client you want to view the history.
- Click Login History to view the login details of your
client/user.
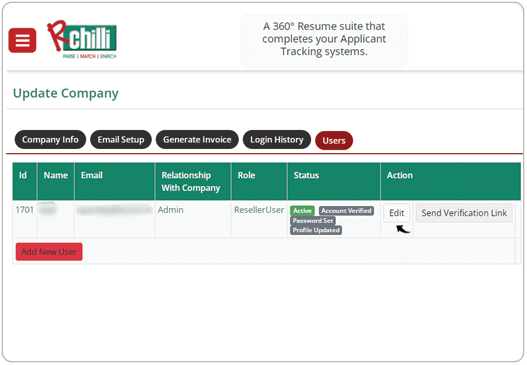
Manage User
Follow the below steps to manage your client/user profile.
- On the Client Management page, click View Details for the
client you want to manage the profile details.
- Click the User tab to edit the user profile details. Click
Edit to edit the user profile.Note: You can click Add New User to add a new user as necessary.

- Edit the profile of your user as necessary and click Update
User.Note: A success message will be displayed once the user profile is updated.
Impersonate
Follow the below steps to log in to your user My account portal and do the
following.
- On the Client Management page, click View Details for the
client you want to manage the profile details.
- Click the User tab to login into your user My account portal. On the
User tab, click Impersonate.

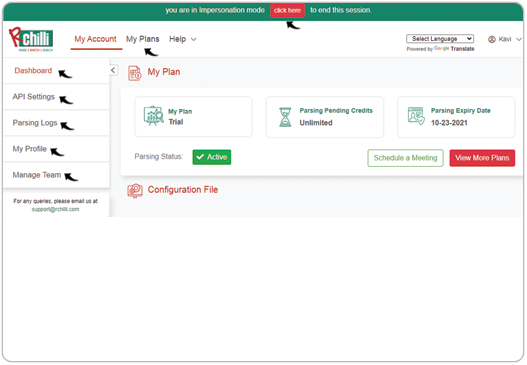
- Once you click Impersonate in the above step, you will get access to
your user's account. You can do the following on behalf of your user:
- Plan update: Click My Plans tabs and subscribe to a new plan or change the plan for your user. See Plan Subscription and Cost for more details.
- Parsing Logs: Click Parsing Logs to view the parsing logs of your user, see Parsing Logs for more details.
- Invoice: Click Invoice to view the invoice details of your user, see Invoice Details for more details.
- Update Profile: Click My Profile to update the profile of your user, see Profile Update for more details.
- Manage user's team: Click Manage Team to view/manage your user team member's, see Manage Team for more details.
Note: Click click here to end the impersonate session.