
Plan Subscription and Cost
This topic describes how a user can subscribe to a new plan or update an existing plan.
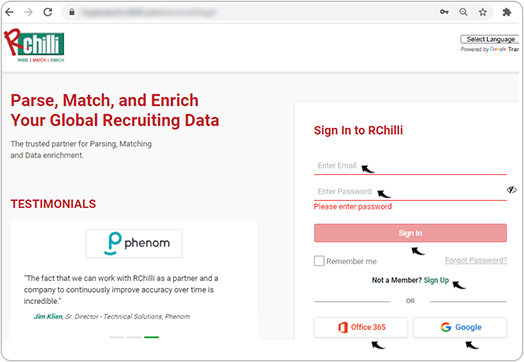
- Enter your Email and Password to log in to your RChilli My Account
partner portal. You can also Sign Up to register a new account or log in
using Office 365 or Google accounts as necessary.Note: Contact support@rchilli.com for My Account portal access, subscription plans, pricing, and for any further support.
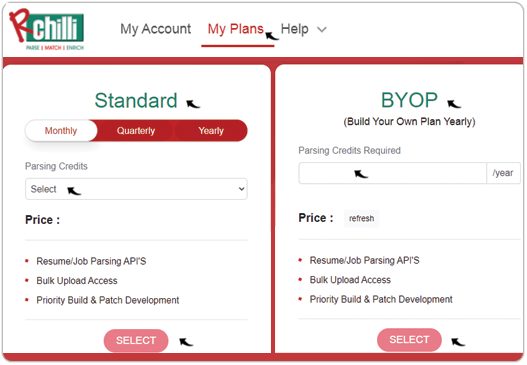
- On the My Plans tab, you can choose either Standard or BYOP
plan as follows and click SELECT.
- Standard: These are the standard plans available, select any plan in the Parsing Credits field.
- BYOP (Build Your Own Plan: You can create a plan as per the required
parsing credits, enter the number of parsing credits in the Parsing
Credits Required Field.Note: Make sure the minimum parsing credits entered are more than 10000.
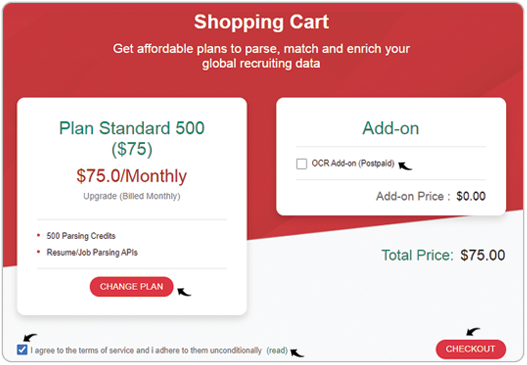
- Once you select a plan in the above step, the Shopping Cart page will be
displayed. On this page, you can do the following:
- Change Plan: Click on the CHANGE PLAN to change the plan if necessary.
- Add-on: On the Add-on page, you can select the add-on as
applicable against the plan.
- OCR Add-on: This add-on must be selected if you want to parse the scanned document.
- Taxonomy Add-on: This add-on must be selected to use the Taxonomy. To know more about Taxonomy, see Taxonomy.
- Search and Match Add-on: This add-on must be selected if you want to search and match the resume/JD. To know more about search and match, see Search and Match.
- Dedicated Server Add-on: This add-on must be selected if you want a server with total isolation, control, and security using customizable dedicated server hosting.
- Read the terms of service: Click read to read the terms of service and accept the terms of service before you process the payment.
- Checkout: Click CHECKOUT to proceed with payment for the plan selected.
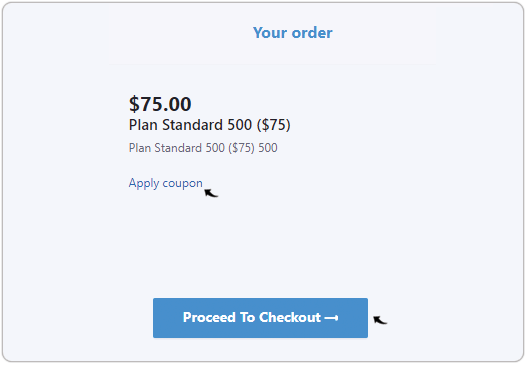
- A new page Your Order will be displayed, click Proceed To
Checkout.Note: If you have any discount coupons, click Apply coupon and enter coupon code to get the discount.
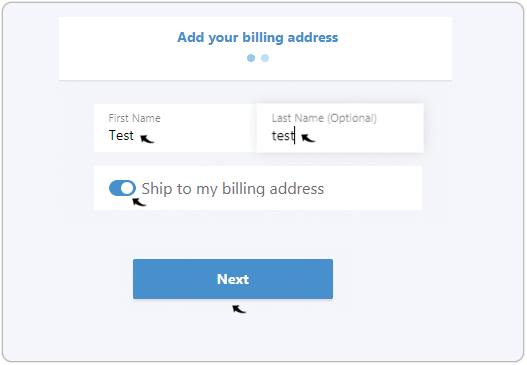
- On the Add your billing address page, enter your First Name and
Last Name (optional) and click Next.Note: If you do not want to ship your bill to the billing address then click the button against Ship to my billing address to add a new shipping address.
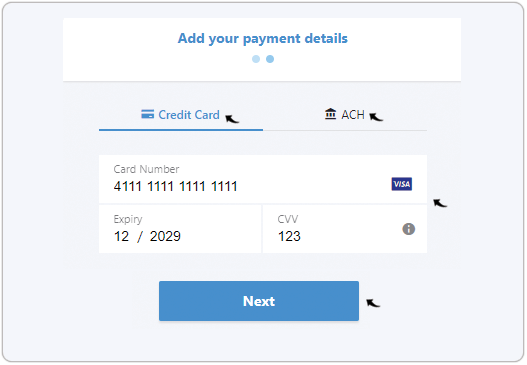
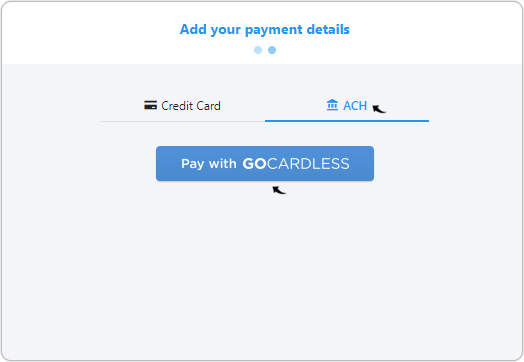
- On the Add your payment details page, enter your payment details
and click Next.Note: For payment, you get two options, either Credit Card or ACH (Automated Clearing House). Follow the below steps for credit card payment, and for ACH payment, see ACH Payment.
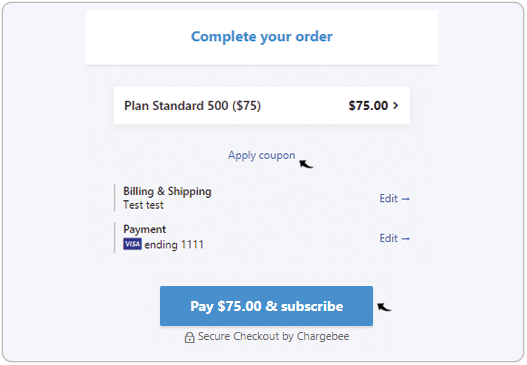
- On the Complete your order page, verify the payment details and click Pay
& subscribe.Note: If you have any discount coupons, click Apply coupon and enter coupon code to get the discount.
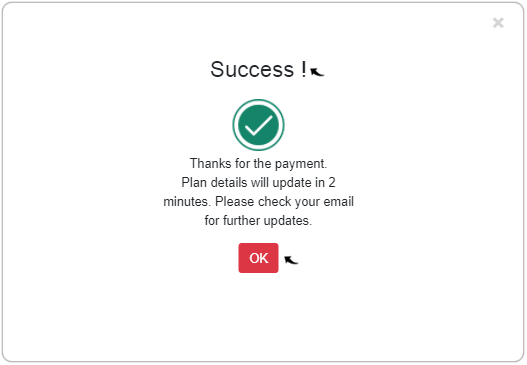
- A Success pop-up will be displayed once you subscribe to a plan successfully.
Click OK on the Success pop-up.
ACH Payment
Note:
- ACH payment applies to the US customer only.
- ACH payment option is enabled only for the plan that is priced more than $10000 (yearly plans).
- Click ACH for ACH payment at Step-6 above and then click Pay with
GOCARDLESS.
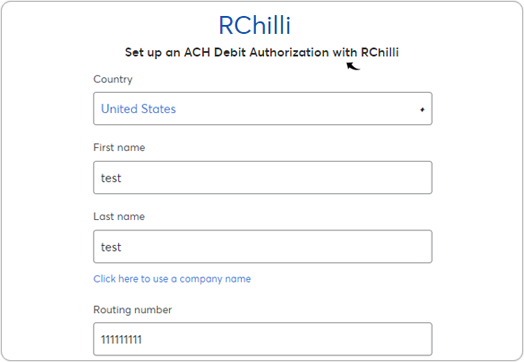
- Once you click Pay with GOCARDLESS in the above step, a pop-up will be
displayed to Set up an ACH Debit Authorization with RChilli. Fill all the
fields on the pop-up as necessary, and at the bottom of the pop-up, click Set
up ACH Debit Authorization.
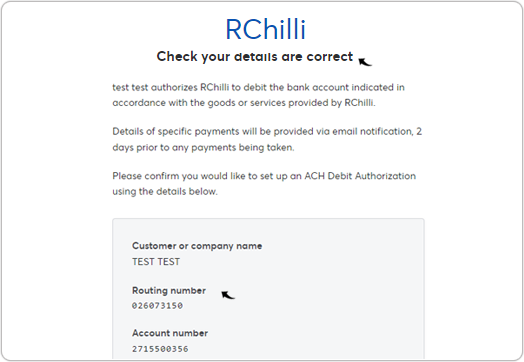
- Verify the account details on the pop-up Check your details are correct
and click Confirm at the bottom of the pop-up.
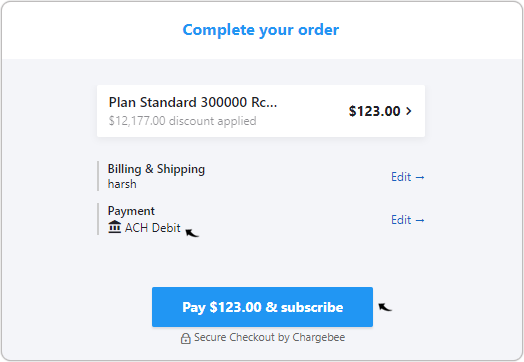
- Once ACH payment details are added successfully, ACH Debit will be added
as the Payment method on the Complete your order page. Click
Pay & subscribe once the payment details are verified.
- A Success pop-up will be displayed once you subscribe to a plan
successfully. Click OK on the Success pop-up.