Upload Resume
This topic describe the procedure on how you can upload resumes into the candidate pool of your Oracle Cloud HCM account.
Follow the below procedure to import resumes using RChilli browser assistant into the candidate pool of your Oracle Cloud HCM account.
- Log in to your RChilli browser assistant and click Upload tab to upload
resume. On the Upload tab, you can either select Upload Resume or
Select and Add Resume, see the following sub-section for more details.
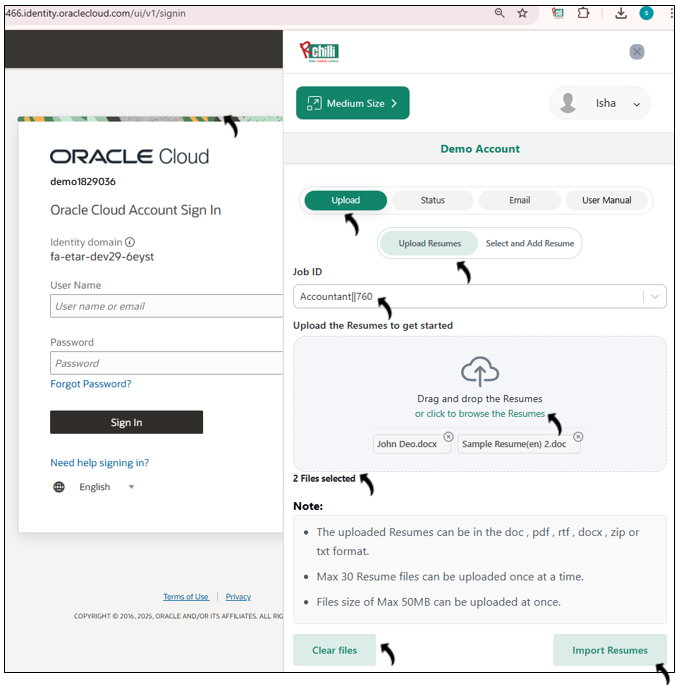
- Upload Resumes: Upload resumes from your local computer using the
Upload Resumes option in the Oracle Extension:
- Job ID: To upload resumes against a specific Job Requisition,
enter the Job ID (Job Requisition ID). This feature works
only if the System Source Owner details are configured in
RChilli MyAccount, see System Source Owner in the Oracle API Details
Settings.Note: You can upload resumes with or without a Job ID.
- Click on the Drag and drop the Resumes block and select
resumes from your local computer. Once the resumes (files) are
selected, click on Import Resumes.Note:
- The uploaded Resumes can be in the doc, pdf, rtf, docx, zip or txt format.
- Max 30 Resume files can be uploaded once at a time.
- Files size of Max 50MB can be uploaded at once.
- You can verify the number of files selected for importing.
- Once files are added, you can remove them by clicking red cross icon on the files if necessary.
- Click Clear files to clear all the selected files and re-upload.
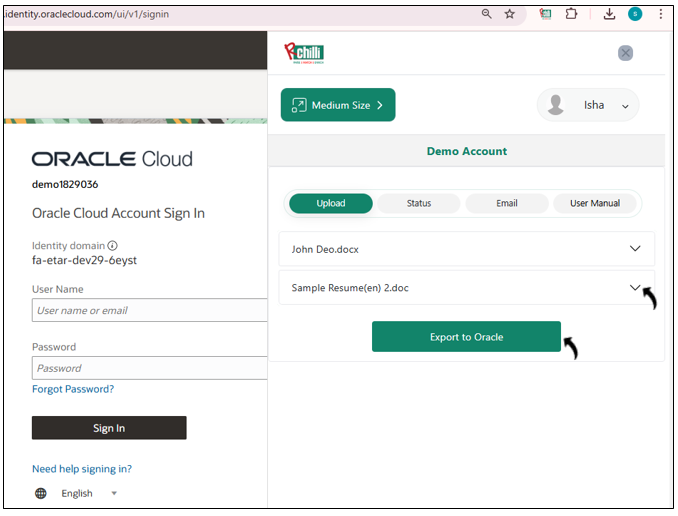
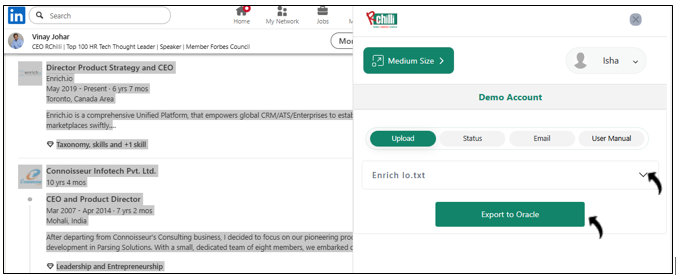
- Once you clicked Import Resumes in the above step, all the
resumes gets uploaded. Click Export to oracle to export the
resumes into the candidate pool.Note: Click on the drop-down icon against any of the uploaded file to Verify Details of the resume and edit the details if necessary (see below step-2 for more details).
- Job ID: To upload resumes against a specific Job Requisition,
enter the Job ID (Job Requisition ID). This feature works
only if the System Source Owner details are configured in
RChilli MyAccount, see System Source Owner in the Oracle API Details
Settings.
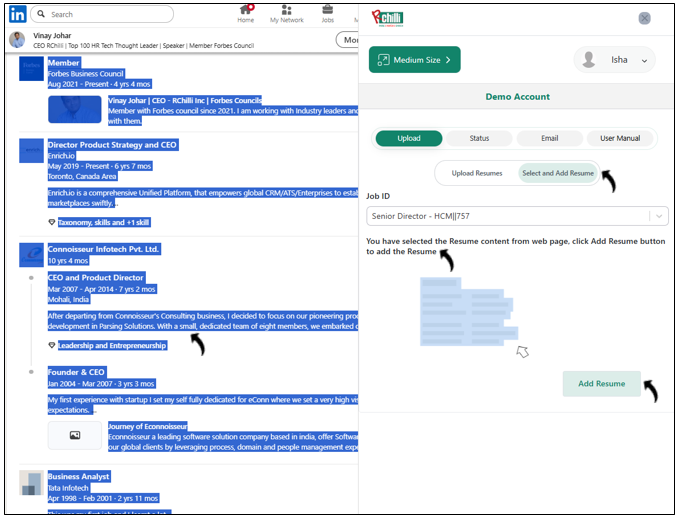
- Select and Add Resume: To copy the resume details from your web
browser and upload, select this option and follow below step.
- Job ID: To upload resumes against a specific Job Requisition,
enter the Job ID (Job Requisition ID). This feature works
only if the System Source Owner details are configured in
RChilli MyAccount, see System Source Owner in the Oracle API Details
Settings.Note: You can upload resumes with or without a Job ID.
- Copy the resume content from the web browser and click Add
Resume on the RChilli browser assistant.
- Once the resume content is added, give a valid name in the extension
(sample.txt). Click drop-down icon to verify and edit the
sample.txt details as necessary (see next step for more
detail). Once the resume content (sample.txt) details
verified, click Export to oracle.
- Job ID: To upload resumes against a specific Job Requisition,
enter the Job ID (Job Requisition ID). This feature works
only if the System Source Owner details are configured in
RChilli MyAccount, see System Source Owner in the Oracle API Details
Settings.
- Upload Resumes: Upload resumes from your local computer using the
Upload Resumes option in the Oracle Extension:
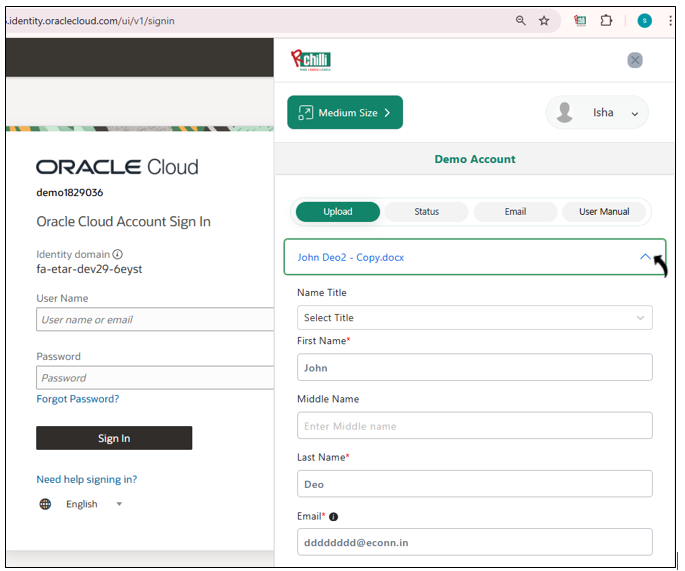
- Once you clicked drop-down icon in the above step, resume details is displayed. Use
the vertical scrollbar to verify details and edit the resume different sections
details as necessary. You can scroll to different sections i.e., Candidate
Address, Education, Experience, Languages,
Certifications, or Skills to update the sections as
necessary.Note: You must fill the mandatory fields like First Name, email, etc, if not filled, then mandatory fields are highlighted in red colour.
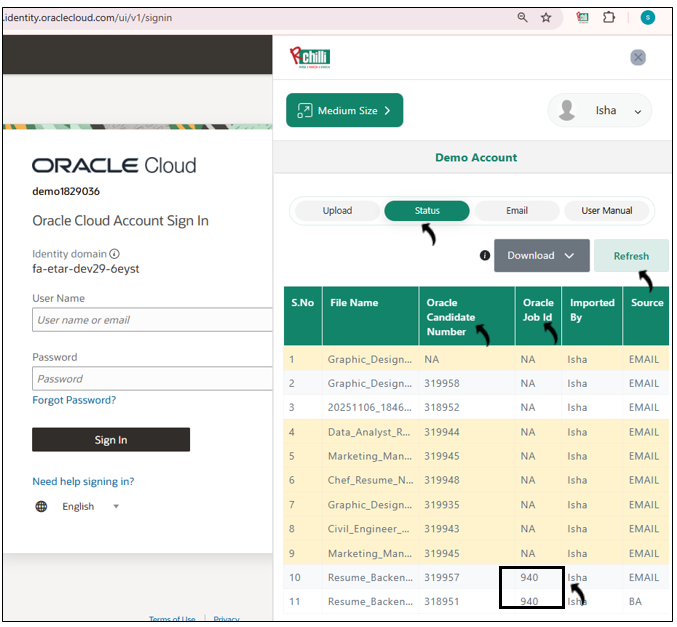
Status
- Once the files are uploaded successfully, you can view the uploaded
resumes in the Status tab. You can use the bottom horizontal scrollbar to
view the S.No and respective File Name, Oracle Candidate
Number, Imported By, Source, Status, Template
Status, and Date.Note:
- It takes few minutes to get the resume uploaded in the Status block, click Refresh to refresh the resumes in the Status block.
- Template Status is applicable only if you have selected Template Resume or Both options for Resume Format during Redaction settings. See Configure the Resume Format for more details.
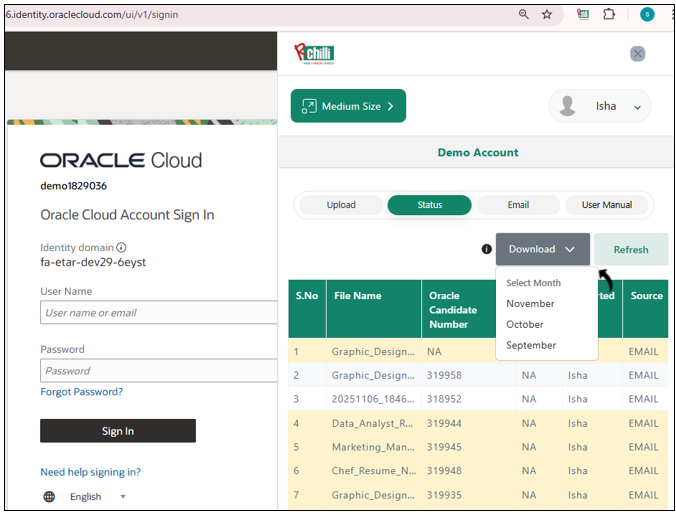
- Click on the Download button and select the month for which you want to
download the logs.Note: Logs are available for maximum of three months or 90 days data.
Candidate Search in Oracle Cloud HCM
Note: Follow the steps below to view resumes uploaded through the
Oracle Extension without a Job ID.
Once resume is uploaded (without Job ID) in the candidate pool, then Oracle
Candidate Number is created, see step-3 above. Using Oracle Candidate Number you can
search the uploaded resume and edit the resume if necessary.
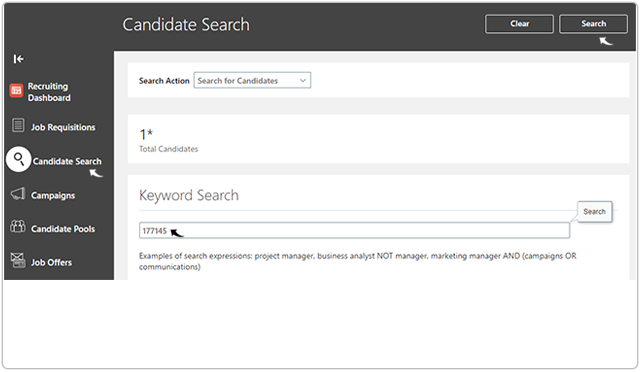
- Log in into your Oracle Cloud HCM account and go to Candidate Search.
Enter the Oracle Candidate Number and click Search to search
the candidate.
- On the Candidate Search page, click on the candidate name to view and
edit the candidate details as necessary.

- On the candidate page, scroll down to different sections, click on the
Edit icon or Add button to edit the candidate details as
necessary.

- Click Attachment and select View as List. The Original and the template
format of resume is uploaded.Note: Resume in the Template Format is uploaded only if you have selected Template Resume or Both options for Resume Format during redaction settings. See Configure the Resume Format for more details.

Job Requisition Search in Oracle Cloud HCM
Note: Follow the steps below to view resumes uploaded through the
Oracle Extension with a Job ID.
Once resume is uploaded in the candidate pool (with Job ID), then against Oracle
Job Id you can view the candidate that are added, see step-3 above. Using
Job Requisition (Job ID) you can search the uploaded resume in Oracle.
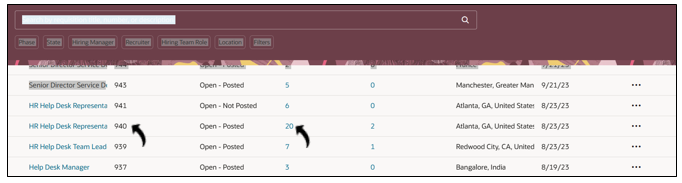
- Log in into your Oracle Cloud HCM account and go to Job Requisitions.
- On the Job Requisitions page, you can view the Job Requisitions and
associated resumes. Note: Resumes uploaded using the Oracle Extension are linked automatically to their corresponding Job Requisition.