Manage Client
This topic describes how the Inflight partner can manage the client details.
- Enter your Email and Password to log in to your RChilli My Account
client portal or use Office 365 or Google to log in as necessary. You
must sign up if you do not have registered account.Note: Contact support@rchilli.com for My Account portal access, subscription plans, pricing, and for any further support.
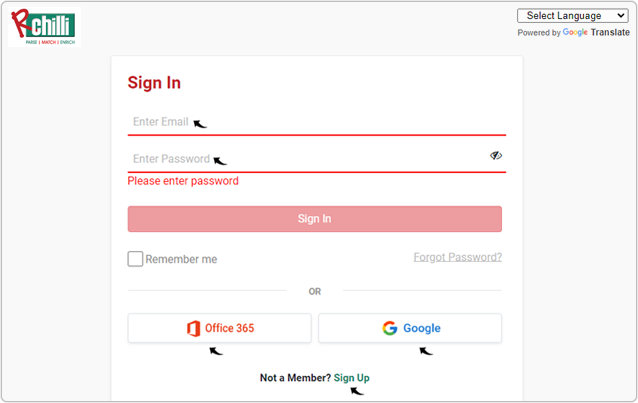
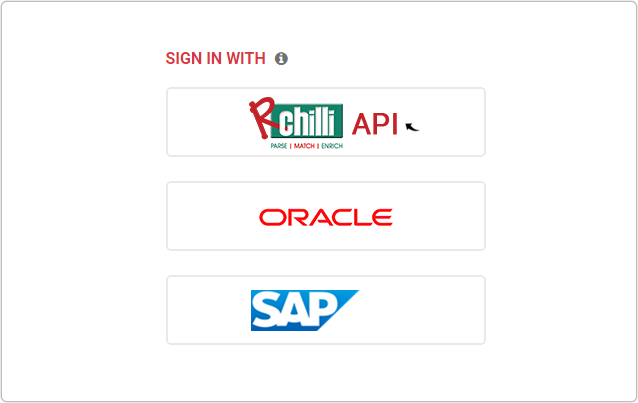
- Click RChilli API to log in into RChilli My Account portal.
- On the My Account tab, click Partner Control Panel.
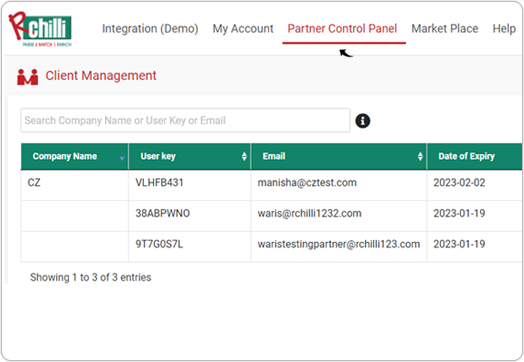
- On the Partner Control Panel, choose the client for which you
want to update the details, click Manage Client.Note: All the existing client will be listed on the Partner Control Panel.
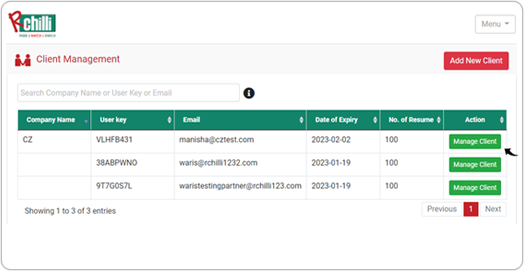
- Once you click Manage Client, you can manage the following:
- Client Details: Click client details to update the client profile.
- Client Plans: Click client plans to subscribe or update the plans for your client.
- Parsing Logs: Click parsing logs to view the parsing details of your client.
- Client Invoice: Click client invoice to view and download the invoice of your client.
Client Details
Follow the below steps to update the client details.
- Once you click Manage Client at step-3, click Client Details on the left-side
navigation panel.
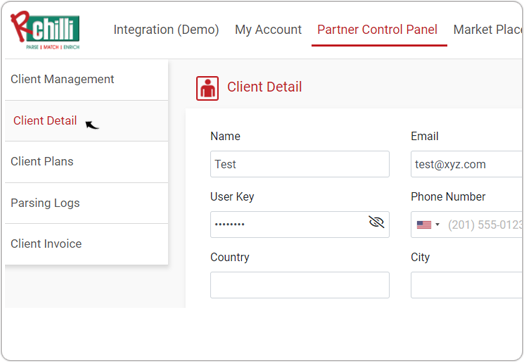
- On the Client Details page, click Update Client.Note: Once you click Update Client, fields will be enabled to be filled.

- Fill the fields as necessary and click Update Client to update the
details..

- A Success pop-up will be displayed once the client details are updated
successfully. Click OK on the Success pop-up.

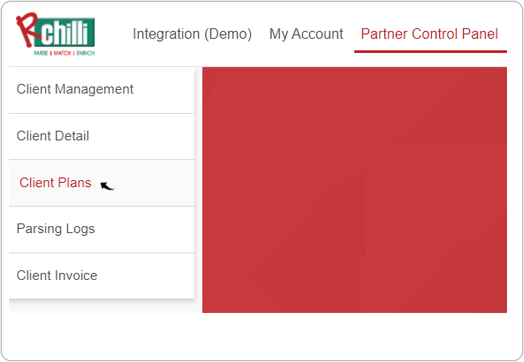
Client Plans
Follow the below steps to update the client details.
- Once you click Manage Client at step-3, click Client Plans on the left-side
navigation panel.
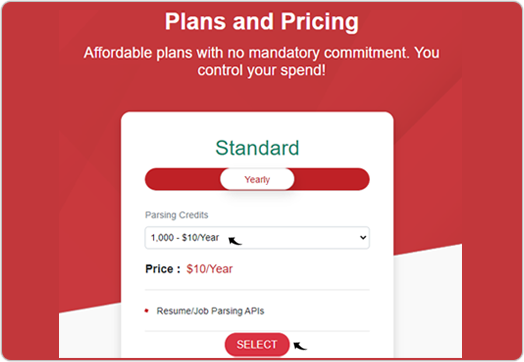
- On the Plans and Pricing section, choose a plan from the Parsing
Credits drop-down and click SELECT.
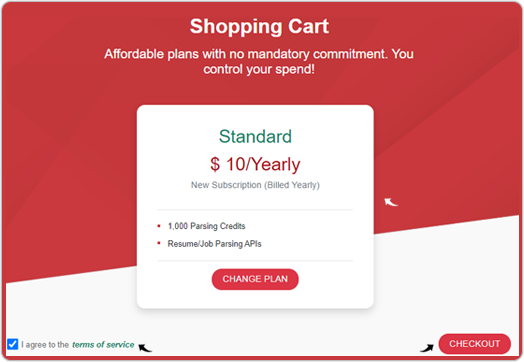
- On the Shopping Cart page, review the plan details, read and accept the
terms and services, and click CHECKOUT.
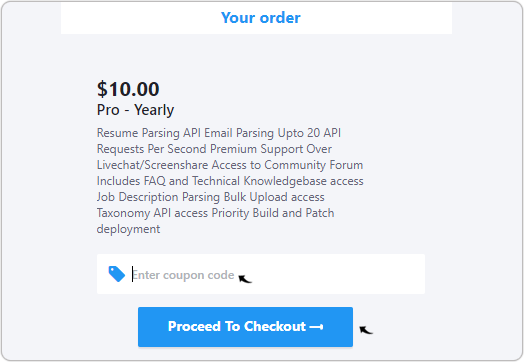
- A new page Your Order will be displayed, click Proceed To
Checkout.Note: If you have any discount coupons, click Apply coupon and enter coupon code to get the discount.
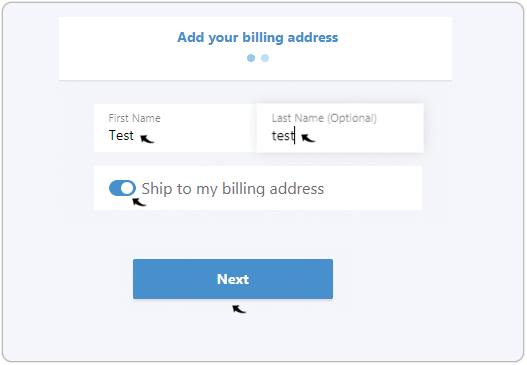
- On the Add your billing address page, enter your First Name and
Last Name (optional) and click Next.Note: If you do not want to ship your bill to the billing address, then click the button against Ship to my billing address to add a new shipping address.
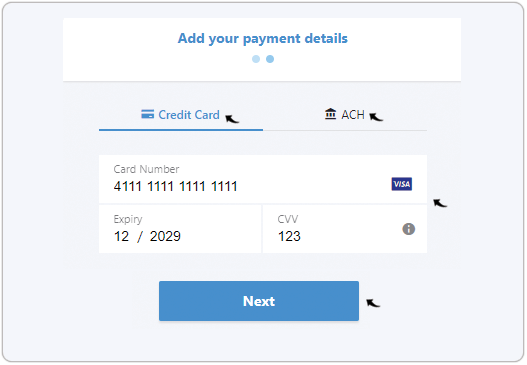
- On the Add your payment details page, enter your payment
details and click Next.Note: For payment, you get two options, either Credit Card or ACH (Automated Clearing House). Follow the below steps for credit card payment, and for ACH payment, refer ACH Payment.
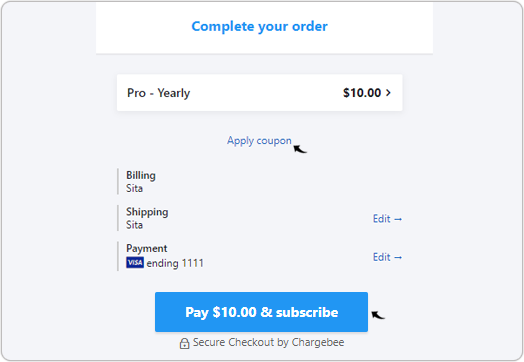
- On the Complete your order page, verify the payment details and click
Pay & subscribe.Note: If you have any discount coupons, click Apply coupon and enter coupon code to get the discount.
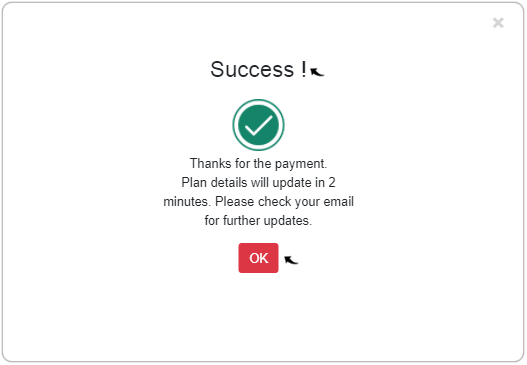
- A Success pop-up will be displayed once you subscribe to a plan
successfully. Click OK on the Success pop-up.
Parsing Logs
Follow the below steps to view the parsing logs of your client.
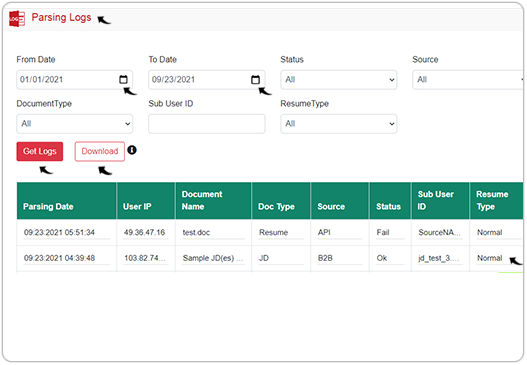
- Once you click Manage Client at step-3, click Parsing Logs on the left-side
navigation panel.
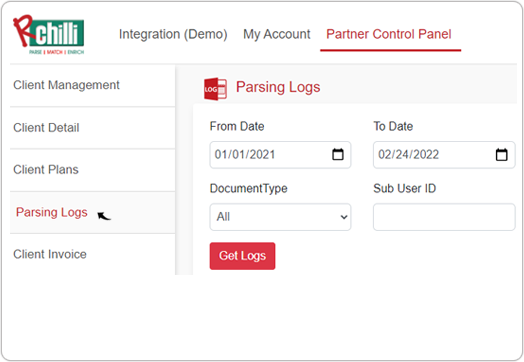
- On the Parsing Logs section, specify the values for the fields such as
From Date, To Date, etc., and click Get Logs. All the
parsing data that fulfills the specified fields criteria will be displayed in
the table.Note: You can click Download to download the parsing logs in the excel sheet format.
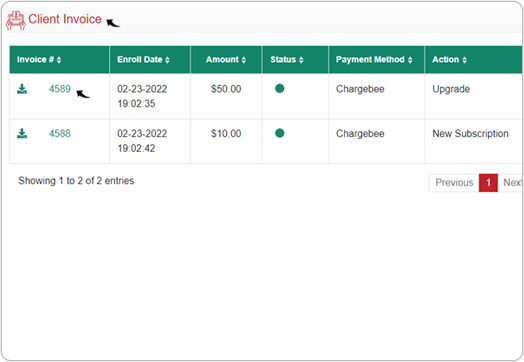
Client Invoices
Follow the below steps to view the invoices of your client.
- Once you click Manage Client at step-3, click Client Invoices on the left-side
navigation panel.
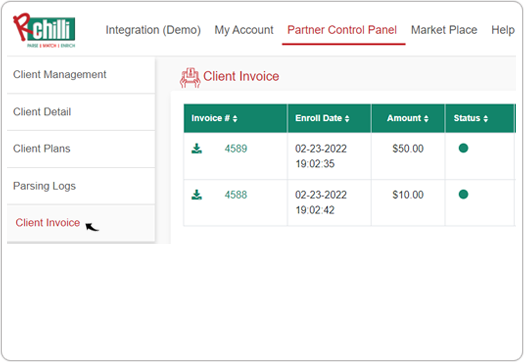
- On the Invoice section, all the invoices will be listed. Click the
 icon against any listed invoice to
download the pdf of the invoice copy.
icon against any listed invoice to
download the pdf of the invoice copy.