Integration with Oracle Cloud HCM
RChilli Parser can be integrated easily with the Oracle Cloud HCM (Human Capital Management) application and is used for resume parsing.
The integrating solution has an easy-to-use setup, which, once configured, is ready to
call the RChilli application to parse the resume.
Note: The images
used in this topic is just for reference purpose, it may vary based on your Oracle
Cloud HCM configuration and the RChilli enablement zip file.
Integration Solution
Perform the following steps to use the RChilli resume parser in the Oracle Cloud HCM
application.
- Request the RChilli Enablement Package via SR from Oracle support.
- Find the data center for your Oracle cloud HCM instance, check with your administrator if necessary for the data center information.
- Once you get the RChilli Enablement Package from the Oracle
support, unzip the package. The RChilli Enablement Package contains the
following:
- Enablement zip files for all data centers: Select the correct
RChilli enablement zip file for your data center and discard
all other zip files, see below recommended RChilli enablement zip
files for the relevant data center.
Region Datacenter Recommended RChilli Enablement zip files Americas us-phoenix-1 RCHILLI_ORC_US-PHOENIX-v625.zip us-ashburn-1 RCHILLI_ORC_US-PHOENIX-v625.zip ca-toronto-1 RCHILLI_ORC_CA-TORONTO-v625.zip ca-montreal-1 RCHILLI_ORC_CA-TORONTO-v625.zip us-gov-1 RCHILLI_ORC_US-GOV-v625.zip EMEA uk-london-1 RCHILLI_ORC_UK-LONDON-v625.zip uk-cardiff-1 RCHILLI_ORC_UK-LONDON-v625.zip uk-gov-london-1 RCHILLI_ORC_UK-GOV-LONDON-v625.zip uk-gov-cardiff-1 RCHILLI_ORC_UK-GOV-LONDON-v625.zip eu-frankfurt-1 RCHILLI_ORC_EU-FRANKFURT-v625.zip eura-frankfurt-1 RCHILLI_ORC_EU-FRANKFURT-v625.zip eu-amsterdam-1 RCHILLI_ORC_EU-AMSTERDAM-v625.zip eura-amsterdam-1 RCHILLI_ORC_EU-AMSTERDAM-v625.zip eu-zurich-1 RCHILLI_ORC_EU-ZURICH-v625.zip APAC/Middle east ap-sydney-1 RCHILLI_ORC_AP-SYDNEY-v625.zip ap-melbourne-1 RCHILLI_ORC_AP-SYDNEY-v625.zip me-jeddah-1 RCHILLI_ORC_ME-JEDDAH-v625.zip me-dubai-1 RCHILLI_ORC_ME-DUBAI-v625.zip ap-mumbai-1 RCHILLI_ORC_AP-MUMBAI-v625.zip ap-hyderabad-1 RCHILLI_ORC_AP-MUMBAI-v625.zip ap-singapore-1 RCHILLI_ORC_AP-SINGAPORE-v625.zip ap-tokyo-1 RCHILLI_ORC_AP-TOKYO-v625.zip ap-osaka-idcs-1 RCHILLI_ORC_AP-TOKYO-v625.zip LAD sa-saopaulo-1 RCHILLI_ORC_SA-SAOPAULO-v625.zip sa-vinhedo-1 RCHILLI_ORC_SA-SAOPAULO-v625.zip - RChilli Oracle Integration Keys PDF document: This PDF document contains your Reference Key, Client ID, and Secret Key details. Note down these details and enter them as mentioned in the section Add Client ID and Client Secret.
- Oracle Notice Document: Follow the instruction mentioned in this Oracle notice document.
- Enablement zip files for all data centers: Select the correct
RChilli enablement zip file for your data center and discard
all other zip files, see below recommended RChilli enablement zip
files for the relevant data center.
- Import the correct RChilli enablement zip file into your Oracle Cloud HCM Instance, see Import RChilli Configuration Package.
- Add RChilli configuration values i.e. Reference Key, Client ID, and Secret Key, see Add Client ID and Client Secret.
Import RChilli Enablement Package
The following steps describe the procedure on how to import the RChilli enablement
zip file into the Oracle Cloud HCM instance.
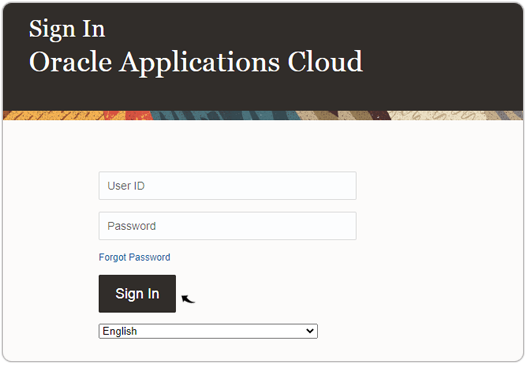
- Visit and sign in to your Oracle Cloud HCM Application .Note: You must have the Application Implementation Consultant Role in addition to the Recruiter and Recruiting Administrator role in order to configure the RChilli integration. Contact Oracle admin for more details.
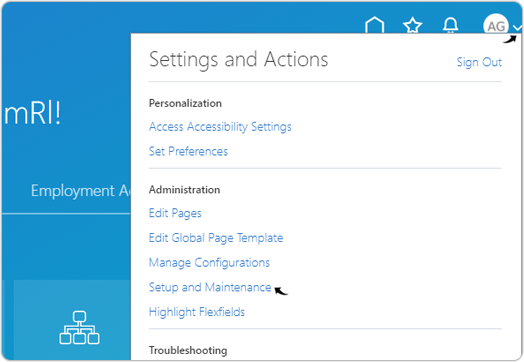
- Click the Settings and Actions menu and select Setup and
Maintenance from the drop-down.
- Click the Tasks
 icon and select Manage Configuration
Packages from the drop-down.
icon and select Manage Configuration
Packages from the drop-down.
- On the Manage Configuration Packages page, click Upload to
upload the RChilli enablement zip file.

- On the Upload Configuration Package page, click Choose File
and upload the correct RChilli enablement zip file, see step-3 of
section Integration Solution for more details.

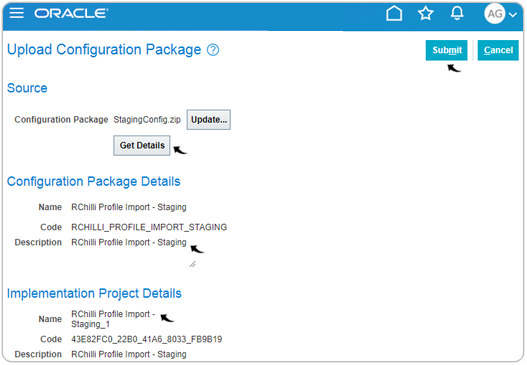
- Once the RChilli enablement zip file is uploaded, click Get Details
to view and verify if the correct files are uploaded. If the data uploaded
is correct, click Submit.Note: The below image is just for reference purpose, the name of the RChilli enablement zip file will be based on the name of the file that you uploaded.
- If the enablement zip file was previously uploaded, a Warning pop-up
will be displayed, click Yes if prompted.

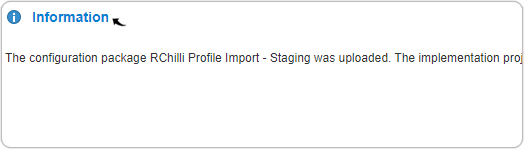
- Click OK to dismiss the Information pop-up once the enablement
zip file is replaced.
- The uploaded files will be imported under the Export and Import
Processes section and the Status must be Completed
successfully.
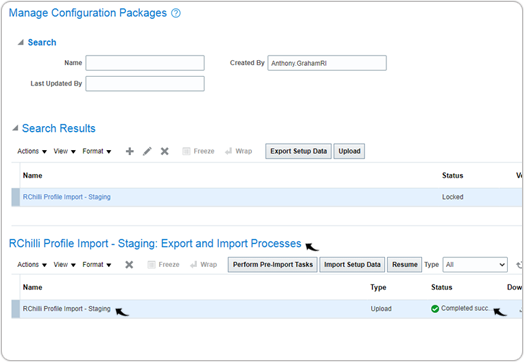
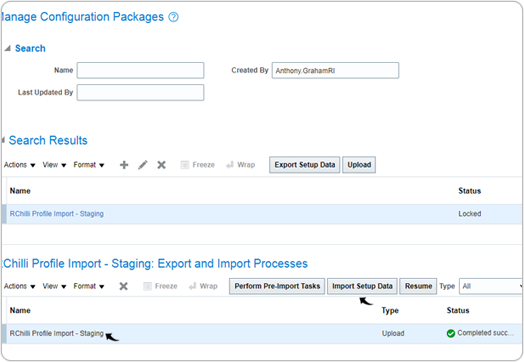
- On the Export and Import Processes section, select the row for the
uploaded RChilli enablement zip file and click Import Setup
Data.
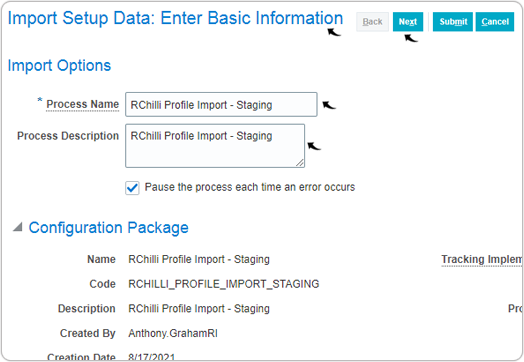
- On the Import Setup Data: Enter Basic Information page, edit the
default Process name and Process Description as necessary and
click Next.
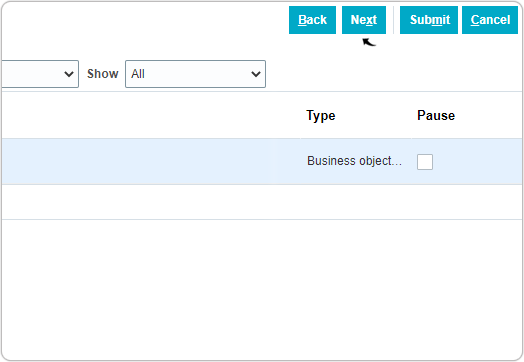
- On the Import Setup Data: Select Pauses for External Import page,
click Next.
- On the Import Setup Data: Schedule and Notifications page, select the
Processing Options as follows and click Submit.
- As soon as possible: This processing option, if selected, the import process starts immediately once you click Submit button.
- Use a schedule: Choose this processing option if you want to schedule the import process to a later date.

- On the Manage Configuration Package page and under the Export and
Import Processes section, check the Status and wait till it
changes from Not Started to Completed successfully.Note: Click Refresh
 icon until the Status
changes from Not Started to Completed successfully. This
change in Status takes a couple of minutes.
icon until the Status
changes from Not Started to Completed successfully. This
change in Status takes a couple of minutes.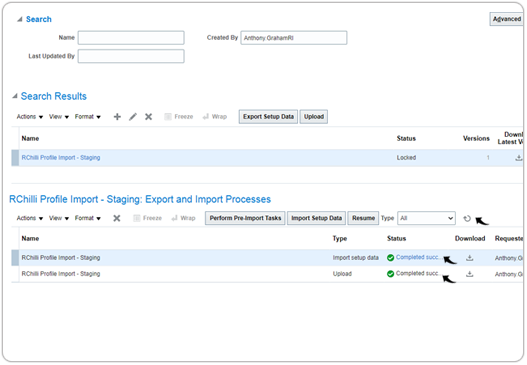
Add Client ID and Client Secret
The following steps describe the procedure on how to add Client ID and Client Secret
into the Oracle Cloud HCM instance.
- Visit and sign in to your Oracle Cloud HCM Application.Note: You must have the Application Implementation Consultant Role to configure the RChilli integration. Contact Oracle admin for more details.
- Click the Settings and Actions menu and select Setup and
Maintenance from the drop-down.
- On the Setup: Compensation Management page, click
 icon and select Recruiting and Candidate
Experience from the drop-down.
icon and select Recruiting and Candidate
Experience from the drop-down.
- On the Setup: Recruiting and Candidate Experience page, select
Recruiting and Candidate Experience Management under the
Functional Areas section.
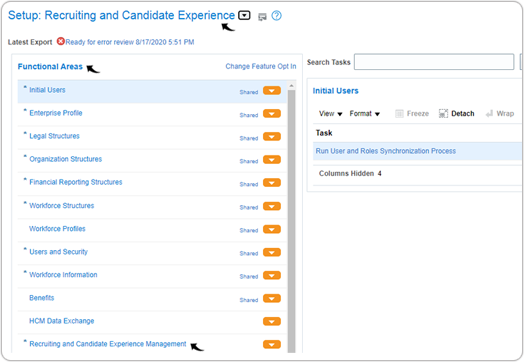
- Select Recruiting Category Provisioning and Configuration under
the Recruiting and Candidate Experience Management section.

- On the Category Provisioning and Configuration page, scroll down to
the Profile Import section and click the Edit
 icon.
icon.
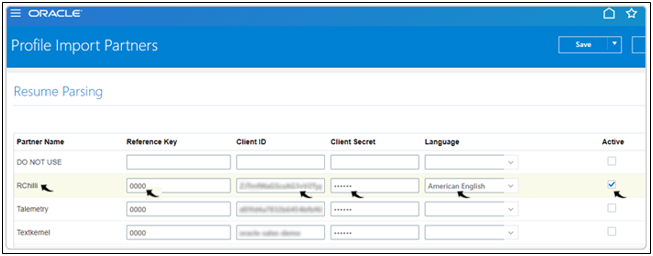
- On the Profile Import Partners page, look for the
RChilli row and do the following:
- Enter the Reference Key, Client ID and Client Secret that you noted in the step-3 of section Integration Solution.
- On the Language drop-down, select a language.Note: American English is the default available language, to add more language, do the configuration as describe in the Configuring Oracle Supported Language.
- Make sure you select the Active checkbox against the RChilli
row.